Blog

  • Video Hooks: 10 Hook Types + 4 Mistakes That Kill Your Views

    Video Hooks: 10 Hook Types + 4 Mistakes That Kill Your Views

    Here’s a hard truth about video hooks: they decide whether your video lives or dies.

    Not your camera. Not the trending song. Not the hashtags you spent twenty minutes researching. The first three seconds.

    Sound dramatic? Maybe. But here’s the thing: it’s true. If people scroll past your opening, nothing else in the video matters, because the platform has already learned that viewers don’t stick around for it.

    The good news? Great video hooks aren’t magic. They follow patterns. And once you see those patterns, you’ll never write a weak opening again.

    In this guide, I’m going to show you exactly how video hooks work. Here’s what you’ll learn:

    • The two things every winning hook must deliver
    • The four mistakes that quietly kill your views (and how to fix each one)
    • The visual details that make or break a first frame
    • 10 types of video hooks you can copy today
    • A simple 5-step process for writing hooks fast
    • Before-and-after hook makeovers you can steal

    Sound good? Let’s dive right in.

    What Is a Video Hook (and Why Does It Matter So Much)?

    What is a video hook? A video hook is the first few seconds of your video: the opening line and the opening visual that decide whether a viewer keeps watching or swipes away. That’s it. It has one job, and that job is to convince a stranger to stay.

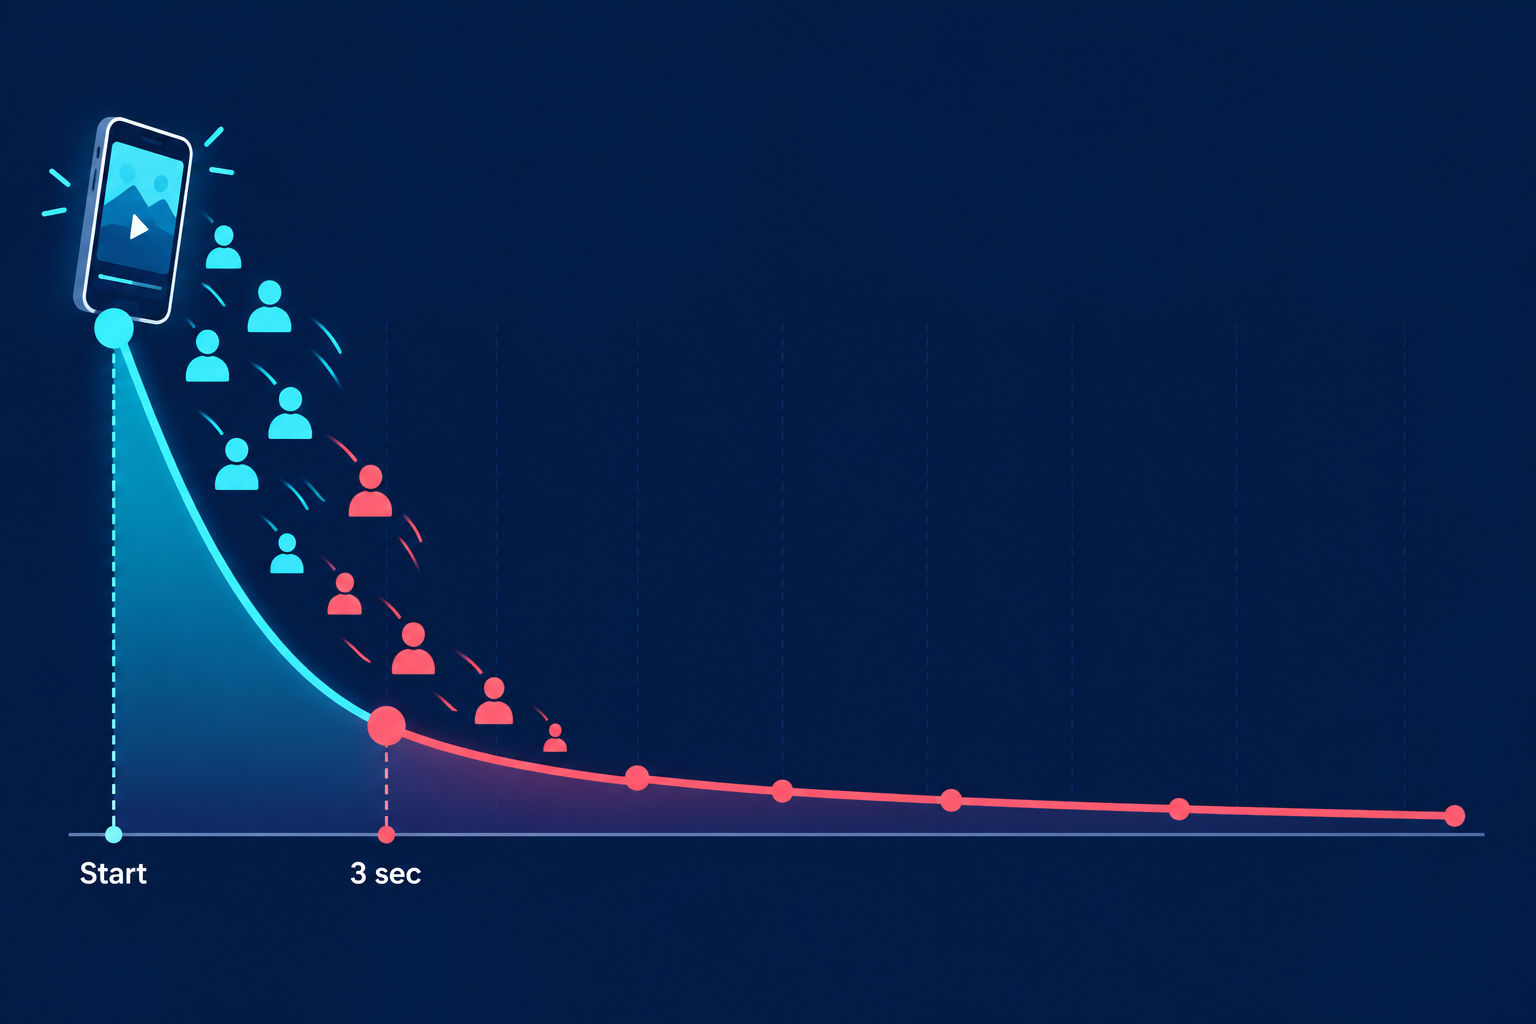
    Why does that matter so much? Here’s the deal. Every platform tracks how many people stick around. Picture a graph that starts at 100% of viewers on second zero. Every second, a few more people leave. And the steepest drop happens right at the beginning.

    So what happens if your best insight arrives at second ten? Let me explain. By then, most of your audience is already gone. They never see it. Worse, the platform notices too. A video that most people abandon quickly is a video it stops showing to new people.

    Here’s the kicker: you can have the most valuable content on the internet, but if your opening is slow, vague, or confusing, it might as well not exist.

    That’s why many creators treat hooks as the biggest lever in short-form video. Is it literally 80% of your results? Nobody can say for sure. But the point stands: fix your video hooks first, and everything else gets easier.

    Audience Drop on Video Watch

    The Two Things Every Winning Video Hook Needs

    Let me simplify this for you. A winning hook doesn’t need to be clever, loud, or shocking. It only needs to deliver two things:

    • Topic clarity: The viewer instantly knows what the video is about.
    • On-target curiosity: The viewer believes the video is for them and wants to know what happens next.

    Simple, right? Best of all, this works in any niche. Clarity tells people what they’d be watching. Curiosity gives them a reason to keep going. Miss one, and the scroll continues.

    Here’s a quick test. Read only your first line, with nothing else around it. Can a stranger tell what the video is about? Do they care? If the answer to either question is no, your video hook needs work.

    So how do you make sure your hook delivers both, every single time? By avoiding four specific mistakes. Let’s go through them one by one. Ready?

    4 Video Hook Mistakes That Are Killing Your Views

    Nearly every weak hook falls into at least one of four traps: delay, confusion, irrelevance, or disinterest. Fix all four, and your video hooks get dramatically better.

    Video Hook Mistake #1: Delay

    What is delay? Delay means you wait too long to tell people what the video is about. The topic shows up in line three, four, or five, after a bunch of throat-clearing that nobody asked for.

    Here’s an example. Imagine opening with: “You won’t believe what I just found on Instagram. Seriously, it’s wild.” Sounds intriguing, right? But here’s the problem: you haven’t told me anything. A wild discovery could be about literally anything. Skincare. Crypto. Cats. As a viewer, I can’t decide if it’s for me, so I do what any sensible human does. I swipe.

    Now compare that with: “Here are three Instagram Story stickers that get more replies from your followers.” In one sentence, I know the topic, the value, and who it’s for.

    The fix? Speed to value. Look at your script. Find the first line that names the topic. Then delete everything above it. Seriously. Cut the greeting, the warm-up, and the backstory. The topic goes in the first one to two seconds.

    Now, a quick warning. Vague, open-ended hooks can occasionally work when the creator’s face, emotion, or on-screen text carries the moment. But then the spoken words add nothing, and that’s a shaky foundation to build on.

    Video Hook Mistake #2: Confusion

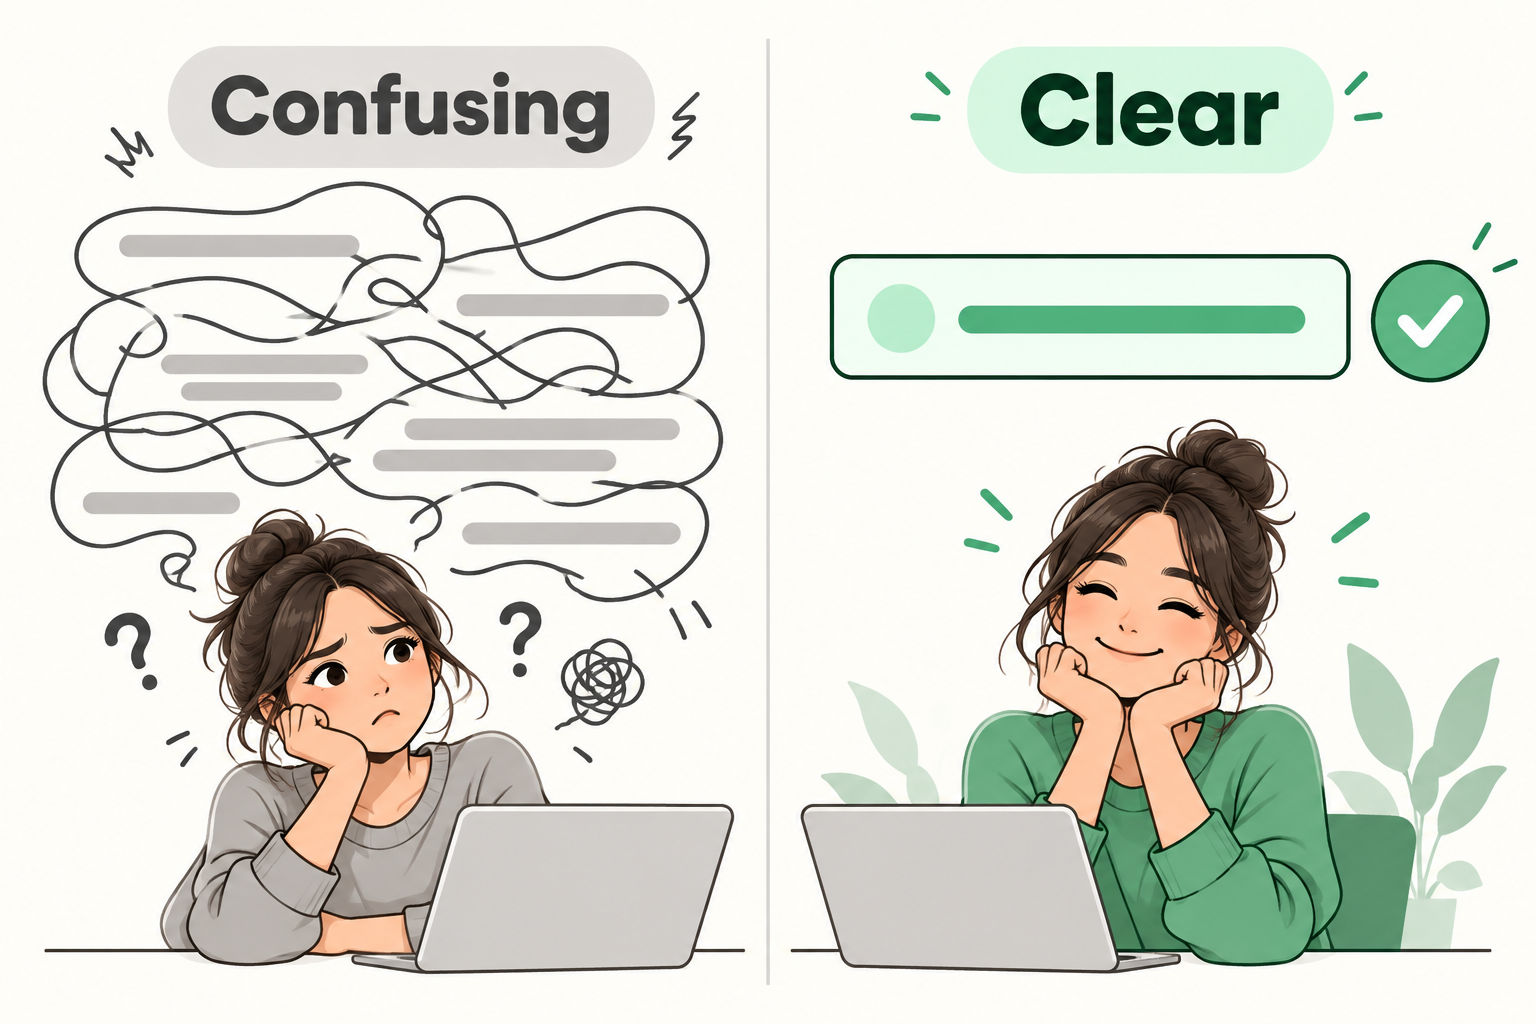
    Delay fixed? Great. Now let’s talk about confusion. This one happens when your opening is fast but hard to understand. The sentence is twisty, the words are fancy, and the viewer has to work to figure out what you mean.

    Here’s what I mean, starting with a confusing example: “The kind of Instagram growth that’s hardest to earn is what brands miss when Reels get skipped.” Wait, what? Now read this: “Most brands stall on Instagram because they skip Reels.” Same idea. Half the words. Twice the clarity.

    Why does this matter? Here’s why: viewers decide in a heartbeat. If they only understand half of your words, they can’t tell whether the video is for them. And when in doubt, they leave.

    So how do you write clearer video hooks?

    • Use fewer words. Say it in the shortest way that still can’t be misunderstood.
    • Use simple words. Aim for a sixth-grade reading level.
    • Use active voice. “The dog jumped” beats “the jump of the dog.”
    • Proof it in isolation. Read just the hook. Could it be interpreted two different ways? If so, rewrite it until there’s only one meaning.

    Pro tip: paste your hook into an AI writing assistant and ask it to rewrite the line at a sixth-grade reading level without changing the meaning. It’s a fast way to spot clunky phrasing.

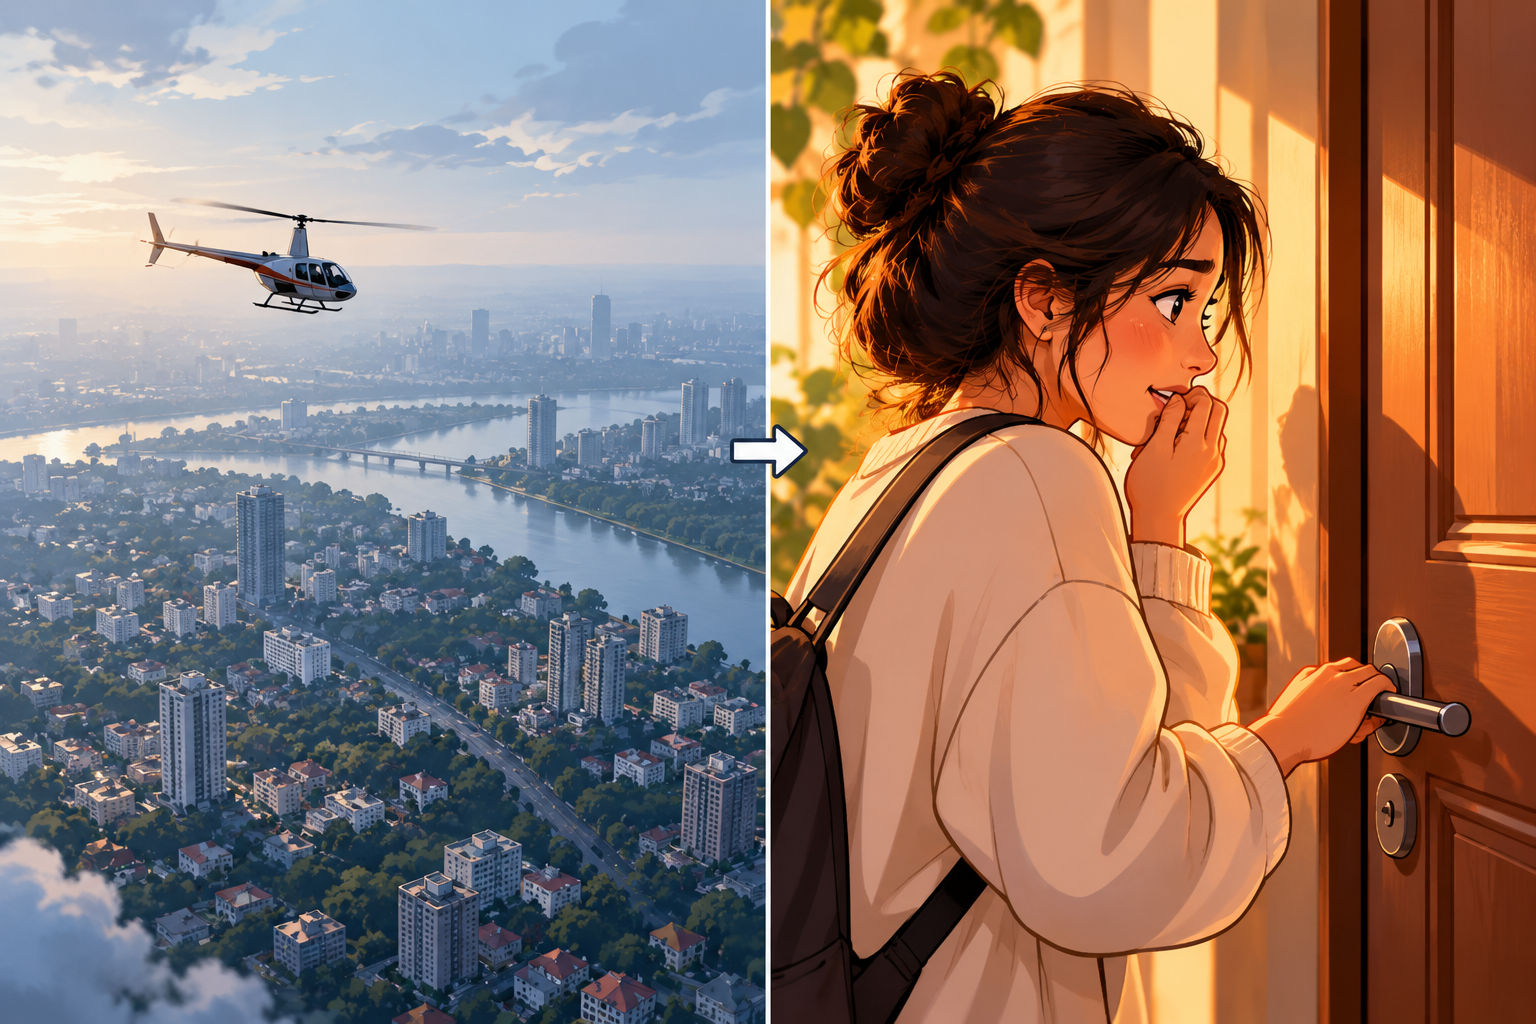
    confusing video story

    Video Hook Mistake #3: Irrelevance

    Now your hook is fast and clear. But there’s still a problem: does the viewer think it’s for them? That’s relevance, and it’s where lots of creators slip.

    Here’s the most common cause: talking about yourself. Consider this opening: “I’ve struggled with low reach for two years.” It might be true. But the viewer instantly wonders, “Do I even have the same problem as you?” That tiny doubt is enough to make them scroll.

    The fix is almost embarrassingly easy. Swap “I” and “me” for “you” and “your.” Instead of “I struggled with low reach,” try: “If your Reels are stuck under 500 views, try this.” Now the viewer sees themselves in the video. The result? More people stay.

    There’s a second trick, too: frame your hook around a pain point. Compare these two:

    • “Here are three trends in social media marketing.”
    • “If your Instagram followers aren’t buying, fix these three things.”

    The first is nice to have. The second solves a problem the viewer already feels. Guess which one gets watched?

    That’s the difference between a hook that informs and a hook that actually hooks.

    Video Hook Mistake #4: Disinterest

    Last one. And it’s the mistake most creators obsess over. Your hook is quick, clear, and relevant. But it still doesn’t make people curious enough to stay.

    The solution is something called a curiosity loop. Here’s how it works: the viewer sees something, asks a question in their mind, gets a little more context, and immediately has a new question. Each answer opens the next question. Your job in the first few seconds is to open the first loop.

    Okay, but how do you open a loop every time, no matter your niche? Here’s how: with contrast.

    Contrast is the gap between what your viewer already believes and a different possibility you’re offering. Picture two points. Point A is the common belief: “You need to post every day to grow.” Point B is your alternative: “Here’s why fewer, better posts can win.” The distance between A and B is what makes people lean in. Pretty cool, right?

    There are two ways to use it:

    • Stated contrast: You say both sides out loud. “Most people fix low reach by posting more, but the smarter fix is a better first line.”
    • Implied contrast: You state only the alternative, because your audience already knows the baseline. “If you want people to watch longer, rewrite your first line before you touch anything else.”

    Tactically, put topic clarity in line one and set up the contrast in the next one or two lines. That’s why hooks are often two or three lines, not one punchy sentence. If you can do both in a single line, brilliant. Save it. You’ll reuse it again and again.

    Don’t Forget the Visual Side of Your Video Hooks

    So far, we’ve talked about words. But a video hook is also what people see. And plenty of great scripts get wrecked by a messy first frame. Best of all, most of these fixes take just a few minutes.

    Respect the Safe Zone

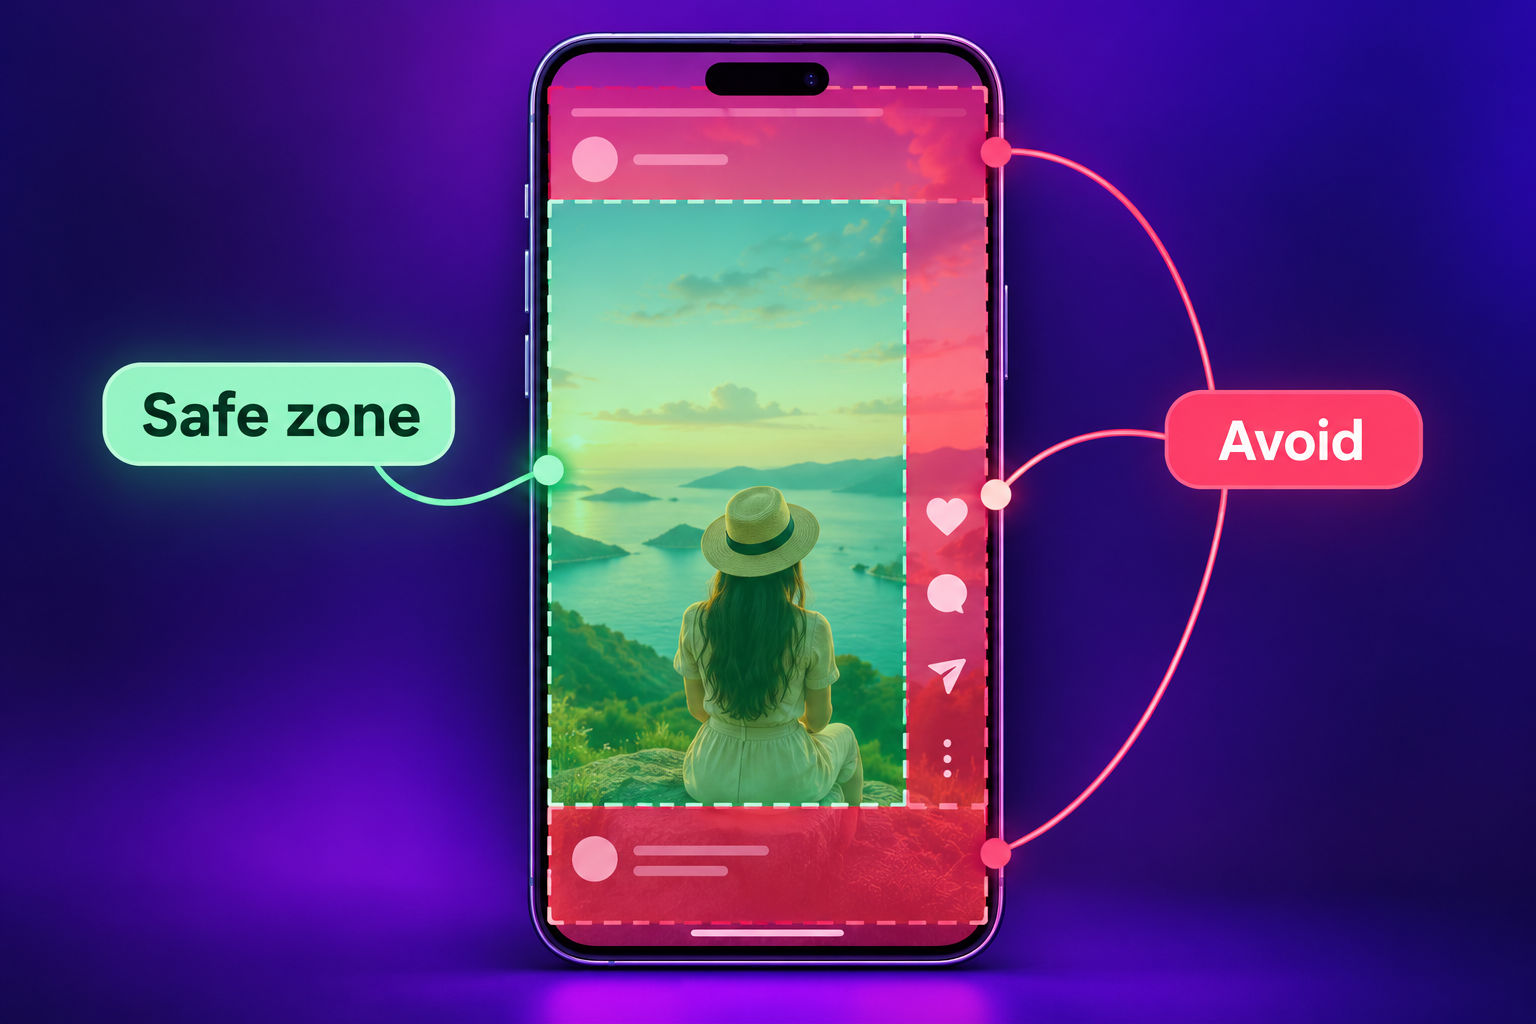
    Every platform covers parts of the screen with buttons, captions, and usernames. Text that sits under those elements becomes unreadable. Keep your hook text inside the safe zone, and keep it a little smaller than you think you need.

    Declutter the First Frame

    Is there one clear focal point? Or is the frame a mash of props, text, and background? A cluttered opening makes it harder for a viewer’s brain to say, “Hmm, that’s interesting.” Simplify. One subject. One message.

    Add Context With On-Screen Text

    Your spoken line might be strong. But if the frame shows a person in a kitchen saying something with no context, viewers are lost. Put a short text hook at the top that names the topic, then let your spoken line add the curiosity.

    Keep the Loop Open

    Here’s a sneaky trick. If your first frame shows the answer, such as the finished result, viewers solve the mystery themselves and leave. Instead, blur or hide the reveal and let the text raise the question. Keep the loop open until the payoff.

    Make Your Profile Match Your Hooks

    Most people who find you through Reels will check your profile next. If your grid is full of lovely photos with no clear message, while your Reels open with vague hooks, the mismatch kills trust. Give every format a clear reason to follow you.

    Choose High-Contrast Text Colors

    White text on a dark bar or a bold yellow can pop, while other colors feel cheap or hard to read. Test two or three options and pick the one that reads instantly on a phone screen.

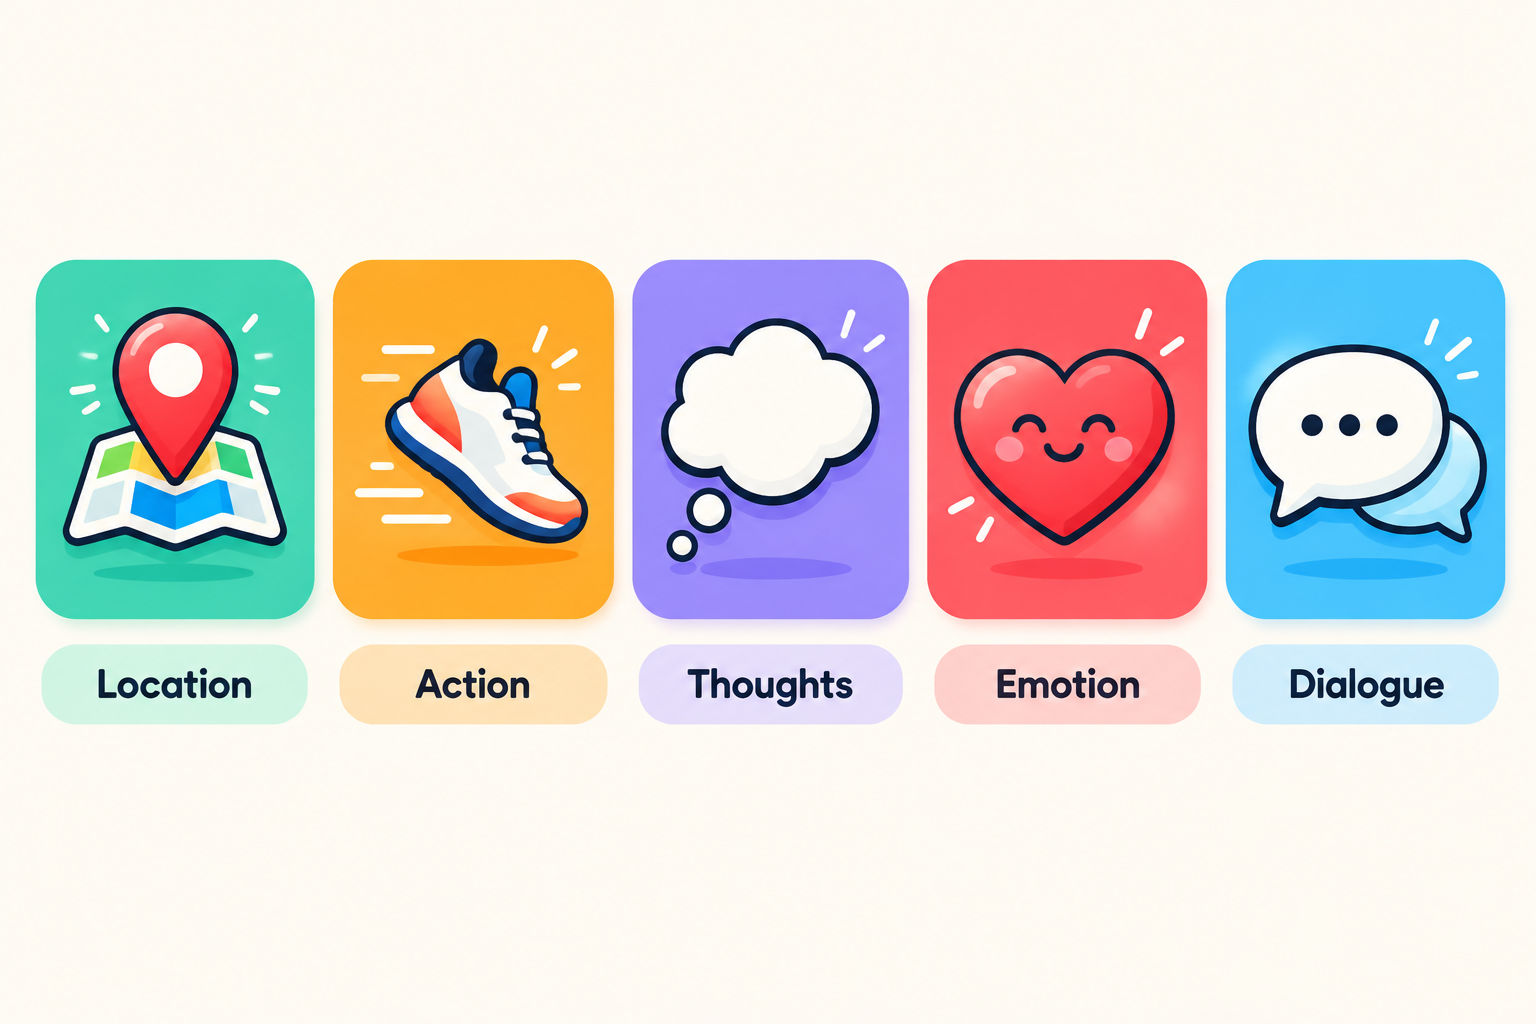
    Visual safe diagram

    10 Types of Video Hooks You Can Copy Today

    Ready for the fun part? Here are ten proven types of video hooks. Mix them, match them, and swap in your own topic.

    1. The Teaser Hook

    What it is: A quick taste of what’s coming, without spoiling it. It creates suspense and leaves viewers wanting more.

    Example: “By the end of this video, you’ll know the one edit that makes Reels feel twice as fast.”

    2. The Question Hook

    What it is: An opening question that gets people thinking. The best ones name a problem your viewer already has.

    Example: “Ever posted a Reel you loved, only to watch it flop?”

    3. The Statistic Hook

    What it is: A surprising number that makes people stop and pay attention. Always use a real, sourced figure. Never invent one.

    Example: “[Your sourced number] of viewers leave before the five-second mark. Here’s how to keep them.”

    4. The Emotional Hook

    What it is: A line that speaks to a feeling, whether that’s frustration, hope, pride, or relief.

    Example: “Posting for months and hearing nothing back is exhausting. Here’s what helps.”

    5. The Personal Story Hook

    What it is: A short piece of your own experience that helps viewers relate and feel connected to you.

    Example: “I almost quit posting last year. Then I changed one thing about my first line.”

    6. The Humorous Hook

    What it is: A funny line that lightens the mood and makes people smile before they scroll.

    Example: “My relationship with the algorithm is complicated. It ignores me, and I keep coming back.”

    7. The Scenic (Visual) Hook

    What it is: A breathtaking or eye-catching visual that grabs attention before a single word is spoken.

    Example: A slow reveal of a mountain sunrise, with the text “How I film travel Reels with just a phone.”

    8. The Testimonial Hook

    What it is: A quote from a real customer or expert that adds credibility right away. Only use real testimonials, with permission.

    Example: “A customer told me this tiny tweak saved her hours every week. Here’s the tweak.”

    9. The Action Hook

    What it is: You start mid-action, showing a product or process in use so viewers see the value immediately.

    Example: Open on the finished product already in motion, with the text “Watch this get built in 10 seconds.”

    10. The Surprise Hook

    What it is: Something unexpected that breaks a viewer’s pattern and makes them stop scrolling.

    Example: “This looks like a photo. It’s actually a video.”

    So which one should you use? Start with the type that best matches your video’s promise, then run it through the four-mistakes check from earlier. If it’s clear, relevant, and curious, you’re good.

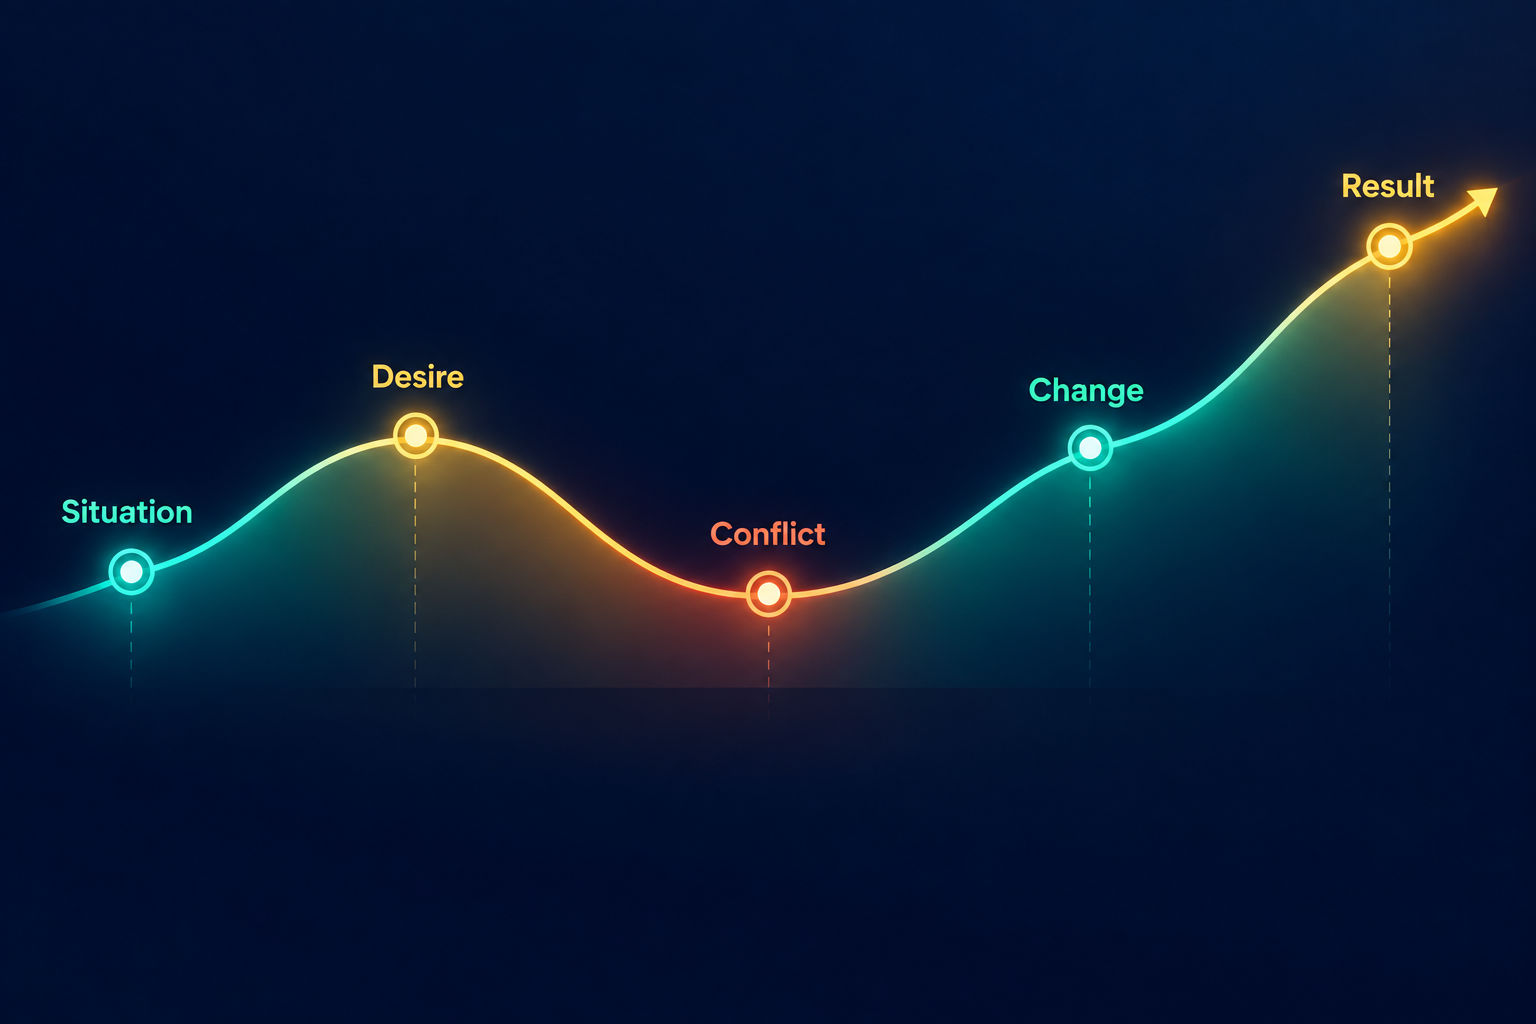
    types of hooks

    How to Write Video Hooks in 5 Steps

    Knowing the types is one thing. Writing them quickly is another. Here’s a simple process you can follow every time.

    Step 1: Build a Swipe File of Proven Video Hooks

    Here’s a secret most beginners skip: study what already works. Why? Because you’ll learn faster from a hundred real examples than from any theory. Find videos in your format and niche that clearly performed well, then write down the first line of each one. Not to copy word for word, but to learn the patterns. Every craft is learned by studying the masters, and video hooks are no different.

    A quick tip: match by format first and niche second. A talking-head hook works differently from a montage hook. But a fitness hook can teach a business creator plenty if both are talking-head videos.

    Step 2: Decode Why the Hook Worked

    Now for the detective work. Ask yourself: what made viewers stay? Look for emotional keywords. Words like “broke,” “burned out,” or “secret” hit differently than bland words like “improve” or “better.” Notice the numbers, the tension, and the target audience. Sometimes the whole difference between a hook that flops and one that flies is one or two words.

    Step 3: Swap Your Topic Into Proven Video Hook Formats

    Take a hook format and inject your idea. Here are fill-in-the-blank templates to get you started:

    • Here’s how to [result] without [common pain].
    • If you’re [audience] struggling with [problem], try this.
    • Most people [common belief]. But [surprising alternative].
    • [Number] mistakes that are killing your [goal].
    • Stop [common action]. Do this instead.
    • The easiest way to [result] in [time frame].

    For example: “The easiest way to get more saves on Instagram this week.” Boom. Done.

    Step 4: Run the Hook Checklist

    1. Clarity: Is this the shortest, clearest way to say it?
    2. Specificity: Can you add a number, a keyword, or a concrete detail?
    3. Audience: Who is this for, and does the wording call them out?
    4. Novelty: Does anything make it stand out from the usual openings? Think of a purple cow in a field of brown ones.
    5. Alignment: Does the rest of the video deliver on what the hook promises?
    6. Visual: Is the first frame clean, and is the text inside the safe zone?

    Step 5: Read It Aloud and Test It

    Say your hook out loud five times. Does it flow? Does it sound like something a real person would say? If it feels clunky, rewrite it. Then publish, watch your retention data, and learn. Over time, the patterns get obvious.

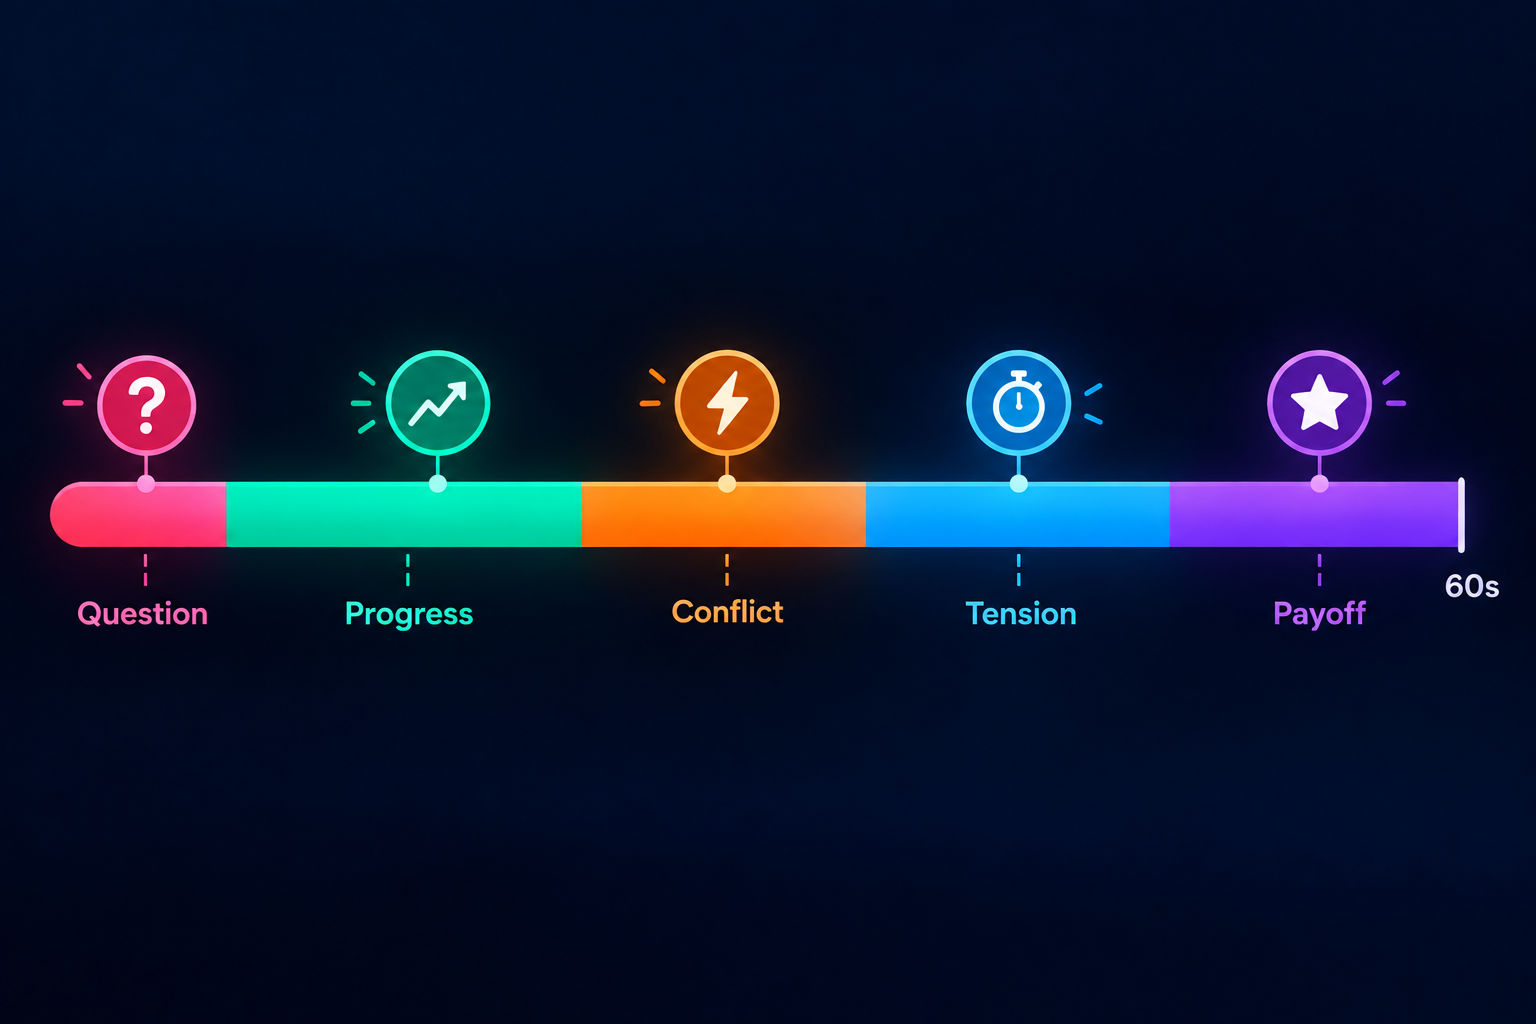
    hook ideas

    Video Hook Makeovers: Weak vs Strong

    Want to see it in action? Let me show you. Here are five quick before-and-after examples.

    Weak hookWhat’s wrongStronger hook
    “Guys, you won’t believe this.”Delay: no context on the topic“Here are three free tools that make Reels editing twice as fast.”
    “I’ve been struggling with my Instagram for years.”Irrelevance: it’s about me, not you“If your Instagram has been stuck for months, try this.”
    “The reach that’s hardest to get comes from consistency in posting Reels.”Confusion: twisty and hard to parse“Consistent Reels are the easiest way to reach new people.”
    “Here are some trends in marketing.”Disinterest: no pain point, no curiosity“If your posts aren’t getting sales, fix these three things.”
    “Today I want to talk about hooks.”Delay and no curiosity“Your first three seconds decide everything. Here’s how to fix them.”

    Notice the pattern? That’s not a coincidence. Every stronger hook is shorter, clearer, and speaks directly to “you.”

    Do Video Hooks Matter More Than Everything Else?

    So are hooks really more important than music, hashtags, and posting time? Let’s be careful here.

    Video hooks are a huge lever. If people leave in the first seconds, no amount of hashtag research will save the video. And chasing the “perfect posting time” won’t beat a stronger opening.

    But hooks aren’t the whole story. Audio quality, lighting, and real value still matter. And a great hook attached to a weak video is just clickbait. If the hook promises one thing and the video delivers another, viewers feel tricked, and they leave anyway.

    Bottom line: think of your hook as the door and the rest of your video as the room. A beautiful room behind a hidden door helps no one. But a great door leading to an empty room doesn’t either.

    Be Patient: Video Hooks Get Better With Reps

    Here’s another thing nobody tells you. Your first few weeks of posting might feel discouraging. Views might sit flat. That’s normal. You’re learning hooks, editing, lighting, scripting, and camera confidence all at once. For many creators, things start to click after a couple of months of steady posting. The ones who quit during the plateau never find out. So treat every video as practice, and keep a rhythm you can actually sustain.

    Track What Happens in the First Seconds

    Check your retention data after each post. Where does the audience drop off? If it’s in the first few seconds, your video hooks need work. If it’s later, the middle of the video needs work. Keep a simple log with the hook type, the first line, and the results. Within a few weeks, you’ll know which hooks your audience loves.

    Video hook matters

    Your Quick Video Hooks Checklist

    Before you hit publish, run through this list:

    • Does the topic appear in the first one to two seconds?
    • Is the wording simple enough for a sixth grader?
    • Does it say “you” and “your” instead of “I” and “my”?
    • Is it built around a pain point or a clear benefit?
    • Does it open a curiosity loop with contrast?
    • Is the first frame clean, with text in the safe zone?
    • Does the rest of the video deliver on the promise?
    • Have you read it aloud at least once?

    FAQs About Video Hooks

    What is a video hook?

    A video hook is the opening line and visual of your video, usually the first three seconds, designed to make viewers stop scrolling and keep watching.

    How long should a video hook be?

    Most video hooks are one to three short lines and last about three to five seconds. Put the topic in the first line, then add curiosity in the next one or two.

    What is the best type of video hook?

    There isn’t one best type. Question, teaser, and pain-point hooks work well for tutorials, while story and emotional hooks work well for personal content. Match the type to your video’s promise.

    Do video hooks work on Instagram Reels, TikTok, and YouTube Shorts?

    Yes. All three platforms reward videos that people keep watching, so the same principles of clarity, relevance, and curiosity apply everywhere.

    Can I reuse the same hook format?

    Yes. Proven formats can be reused with a fresh topic each time. Just avoid repeating the exact same words, or your audience will notice.

    How do I write a hook if I don’t want to be on camera?

    Lean on strong on-screen text, a clean first frame, and a voiceover. A clear text hook at the top can do the same job as a spoken line.

    Why do my videos get views but poor watch time?

    Usually the hook attracts people, but the rest of the video doesn’t deliver on its promise. Make sure the video pays off what the hook sets up, and check where viewers drop off.

    How many hooks should I test?

    Write five to ten video hooks for every video, then pick the clearest and most relevant. Over time, keep a log of what works best for your audience.

    Final Thoughts: Start Writing Better Video Hooks Today

    Let’s recap. Video hooks have one job: get a stranger to stay. To do that, they need topic clarity and on-target curiosity. Avoid the four big mistakes (delay, confusion, irrelevance, and disinterest), keep your first frame clean, and borrow from the ten hook types above.

    Here’s your action step. Take your next video idea and write five different video hooks for it. Read them aloud. Pick the clearest one. Then publish it, check your retention, and learn.

    Do that for a few weeks, and you’ll be amazed how much your views change. Now go write a hook.

  • Instagram Reels vs Posts vs Stories vs Highlights Explained

    Instagram Reels vs Posts vs Stories vs Highlights Explained

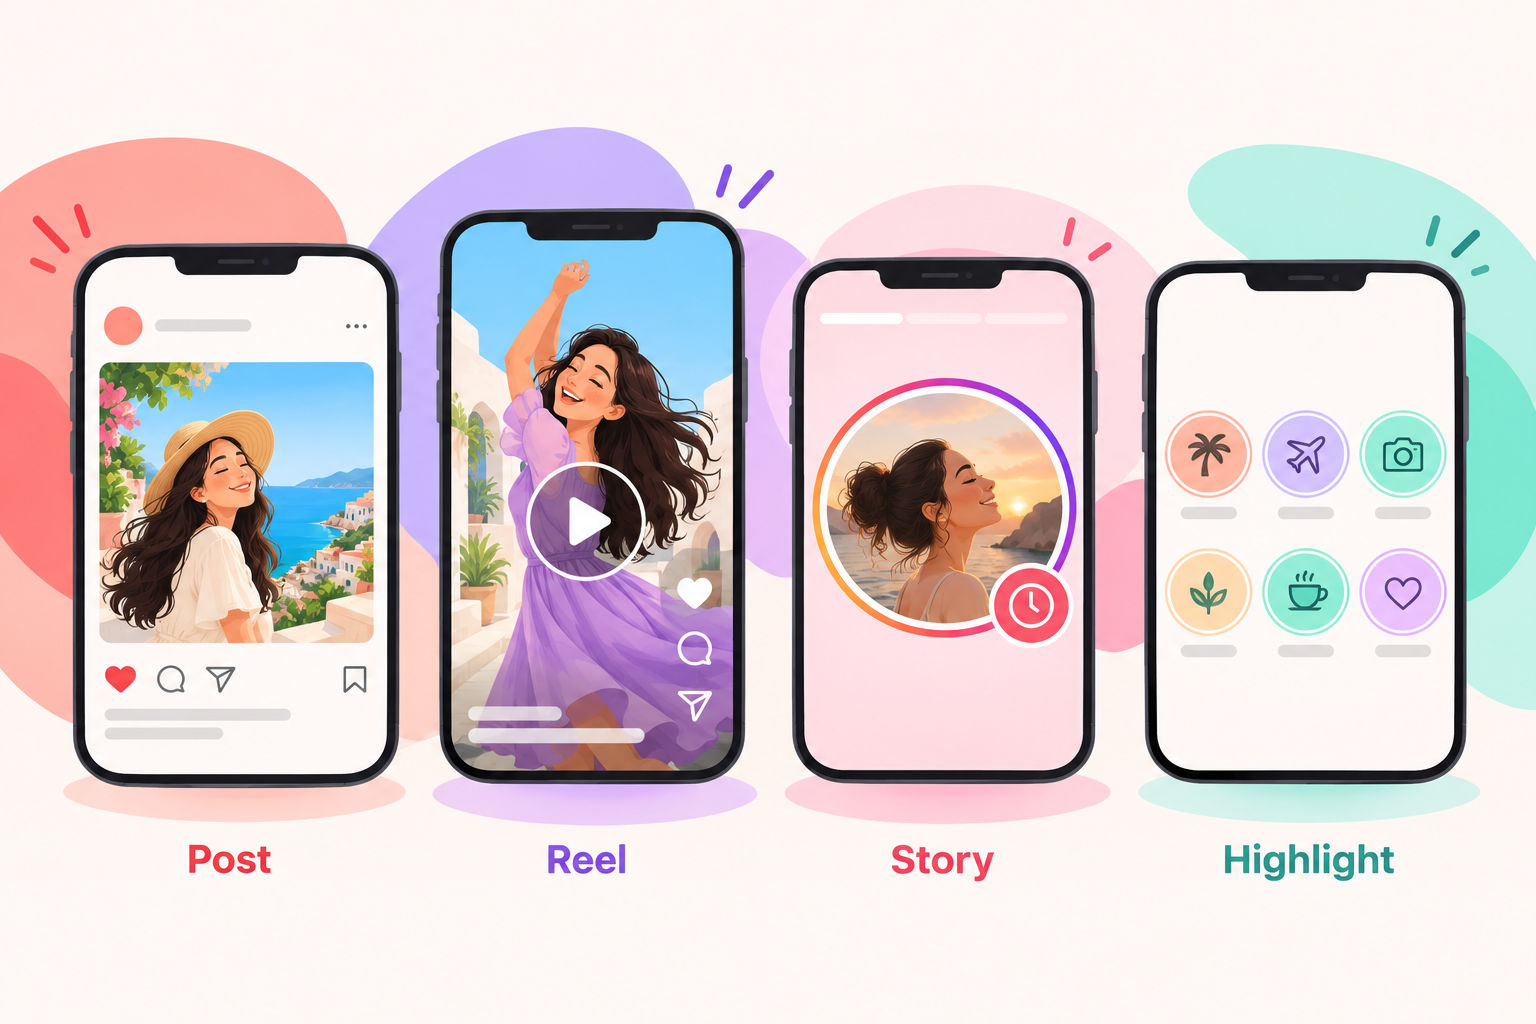
    Instagram Reels vs Posts vs Stories vs Highlights: what is the difference? In short: Posts are permanent photo, video, or carousel uploads that build your profile grid. Reels are short vertical videos designed to reach new people. Stories are casual 24-hour updates for your existing followers. And Highlights are Stories that you save permanently on your profile. Each format has a different job, and using them together is the secret to steady growth.

    Sounds simple, right? But here’s the thing: most creators and brands treat these formats like interchangeable buttons. They post a Reel, paste the same clip into Stories, dump it into a Highlight, and then wonder why nothing works. Instagram Reels vs Posts vs Stories vs Highlights isn’t a question of which one is “best.” It’s a question of which one is right for the goal in front of you.

    In this detailed guide, you’ll learn what each format is, how to set it up step by step, the best practices that actually move the needle, and the challenges you’re likely to run into (plus how to fix them). Grab a coffee. Let’s get into it.

    Post vs Reel vs Story vs Highlight

    Instagram Reels vs Posts vs Stories vs Highlights: The Quick Comparison

    Before we go deep, here’s the cheat sheet. Bookmark this table, because you’ll come back to it.

    FormatHow long it lastsWhere it shows upMain jobBest for
    PostPermanent until you delete or archive itProfile grid, followers’ feeds, Explore, searchBuild your portfolio and authorityPhotos, carousels, tutorials, announcements
    ReelPermanent until you delete or archive itReels tab, Explore, feed, profileReach new peopleShort educational or entertaining videos, trends
    Story24 hours (unless saved)Story tray at the top of the app, and your profile ringStay top of mind with followersBehind-the-scenes, polls, quick updates, launches
    HighlightPermanent until you remove itCircles under your bioOrganize your best StoriesFAQs, testimonials, product info, services

    Notice the pattern? Reels and Posts focus on discovery and long-term value. Stories focus on daily connection. Highlights focus on making your best Stories easy to find. Now let’s break each one down.

    What Are Instagram Posts?

    What is an Instagram Post? A Post is a photo, a video, or a carousel of up to 20 slides that you share to your profile grid and your followers’ feeds. Unlike Stories, Posts stay on your profile until you delete or archive them, so they work like a portfolio that new visitors scroll through before deciding whether to follow you. In the Instagram Reels vs Posts vs Stories debate, Posts are your long-term proof of expertise.

    What Can You Share as a Post?

    • Single photo: Product shots, portraits, quotes, or announcements.
    • Carousel: Up to 20 photos and videos in one swipeable post, perfect for tutorials, checklists, and step-by-step stories.
    • Video: Instagram now shares most new videos as Reels, so a standalone video often appears in the Reels format.

    How to Create an Instagram Post

    1. Tap the plus (+) icon and select Post.
    2. Choose one photo or video, or tap the multiple-select icon to build a carousel.
    3. Pick your crop. Portrait (4:5) takes up the most space in the feed, while square (1:1) is the classic look.
    4. Apply a filter, or fine-tune brightness, contrast, and warmth in the Edit tab.
    5. Write your caption. Open with a hook, add value, and finish with a call to action. Captions can run up to 2,200 characters.
    6. Add alt text, tag people, add a location, and invite a collaborator if you’re co-authoring the post.
    7. Tap Share.

    Best Practices for Instagram Posts

    • Treat slide one like a book cover. For carousels, the first slide decides whether anyone swipes.
    • Use portrait crops. A 4:5 image takes more screen space. Keep key details near the center, because profile thumbnails crop the edges.
    • Front-load your caption. Only the first line or two shows before “more,” so put the hook there.
    • Add alt text. It helps people using screen readers and gives Instagram extra context about your image.
    • Use keywords naturally. Instagram search reads captions, names, and bios, so write the way people search.
    • Keep hashtags relevant. A handful of specific tags beats a giant block of generic ones.
    • Stay visually consistent. Similar colors, fonts, and layouts make your grid look intentional.

    Challenges With Instagram Posts (and How to Fix Them)

    • Lower organic reach: Static images often reach fewer non-followers than Reels. Fix it by leaning on carousels, which invite swipes and saves.
    • Grid cropping: Thumbnails can cut off text and faces. Fix it by designing with safe margins and previewing your grid before posting.
    • Design time: A great carousel takes planning. Fix it with reusable templates you can restyle in minutes.
    • Post and ghost: Sharing and disappearing kills momentum. Fix it by replying to comments in the first hour.
    Instagram Post

    What Are Instagram Reels?

    What are Instagram Reels? Reels are vertical videos, up to three minutes long, with built-in tools for music, captions, effects, and remixing. Instagram recommends them to people who don’t follow you yet through the Reels tab, Explore, and the feed, which makes Reels your strongest tool for reaching a new audience. In the Instagram Reels vs Posts vs Stories comparison, Reels win on reach.

    Reels Specs at a Glance

    • Aspect ratio: 9:16 vertical. 1080 x 1920 pixels is the ideal size.
    • Length: Up to three minutes, though shorter Reels often hold attention better.
    • Cover: Choose a frame from the video or upload your own image, and keep text away from the edges.
    • Audio: Instagram’s music library, original audio, or your own voiceover.

    How to Create a Reel

    1. Tap the plus (+) icon and select Reel.
    2. Record clips with the capture button, or upload videos from your gallery.
    3. Tap Audio to browse trending or saved tracks, or record your own voice.
    4. Use the edit tools to trim clips, change speed, and add text, stickers, and captions.
    5. Tap Next, choose a cover, write your caption, and tag people or topics.
    6. Decide whether the Reel should also appear on your profile grid and feed, then tap Share.
    7. If your account has it, consider Trial Reels to test a video with non-followers before showing it to your followers.

    Best Practices for Instagram Reels

    • Hook viewers in the first two seconds. Start with the result, a bold question, or fast movement.
    • Add on-screen text and captions. Many people watch with the sound off.
    • Cover one idea per Reel. Cut pauses, filler, and long intros.
    • End in a way that invites a replay. A loop-friendly ending boosts watch time.
    • Post original content. Instagram has said it favors original videos over recycled clips with other apps’ watermarks.
    • Use trends selectively. Jump on a trend only when it fits your niche and your voice.
    • Ask for one action. Save it, share it, or follow. Not all three.
    • Study retention in Insights. See where people drop off, then fix that moment in the next Reel.

    Challenges With Instagram Reels (and How to Fix Them)

    • Production time: Filming and editing take effort. Fix it by batch-filming three to five Reels in one session.
    • Trend fatigue: Chasing every trend is exhausting. Fix it by picking one trend in three that truly fits your brand.
    • Unpredictable views: One Reel might flop while the next takes off. Fix it by judging patterns across ten or more Reels, not one.
    • Music limits: Business accounts may have a smaller commercial music library. Fix it with original audio, voiceovers, or licensed tracks.
    • Camera shyness: Not everyone wants to be on screen. Fix it with screen recordings, hands-only shots, or text-led Reels with a voiceover.
    Instagram Reels

    What Are Instagram Stories?

    What are Instagram Stories? Stories are photos and short videos that appear in a tray at the top of the app and disappear after 24 hours. They’re built mostly for people who already follow you, so they feel more casual, personal, and immediate than Posts or Reels. When you weigh Instagram Reels vs Posts vs Stories, Stories win on intimacy.

    Why Do Stories Matter?

    Why bother with something that vanishes? Because Stories build familiarity. Regular Stories keep you visible, invite two-way conversation through stickers and replies, and warm up your audience before you ever ask them to buy, book, or subscribe.

    How to Create a Story

    1. Swipe right from your feed, or tap the plus (+) icon and choose Story.
    2. Take a photo or video, or upload something from your camera roll.
    3. Tap the Aa icon to add text, and the sticker icon to add music, GIFs, a location, or interactive elements.
    4. Try interactive stickers such as polls, questions, quizzes, countdowns, and links.
    5. Choose who sees it: your followers, Close Friends only, or specific people through a message.
    6. Tap Your story to publish.

    Best Practices for Instagram Stories

    • Post in short sequences. Three to seven frames with a clear beginning and end beat a single random frame.
    • Use an interactive sticker daily. Polls and question boxes turn viewers into participants.
    • Respect the safe zone. Keep text away from the very top and bottom, where the app’s buttons cover it.
    • Show the human side. Behind-the-scenes moments and faces beat polished perfection.
    • Add a link sticker for big promotions. Make the next step obvious.
    • Use Close Friends for VIP content. Early access and exclusive offers make people feel special.
    • Save your best Stories to Highlights. Otherwise they vanish after a day.
    • Check the numbers. Taps forward, exits, and replies show you what to keep and what to cut.

    Challenges With Instagram Stories (and How to Fix Them)

    • Daily pressure: Showing up every day is tough. Fix it with simple routines such as tip Mondays and Friday Q&A.
    • Limited reach: Only a slice of your followers sees each Story. Fix it with stickers, short sequences, and posting when your audience is active.
    • Tap-forward drop-off: People skip boring frames. Fix it by keeping frames short, varied, and value-first.
    • Short shelf life: Great Stories disappear in 24 hours. Fix it by saving the best ones to a Highlight.
    Instagram Stories

    What Are Instagram Highlights?

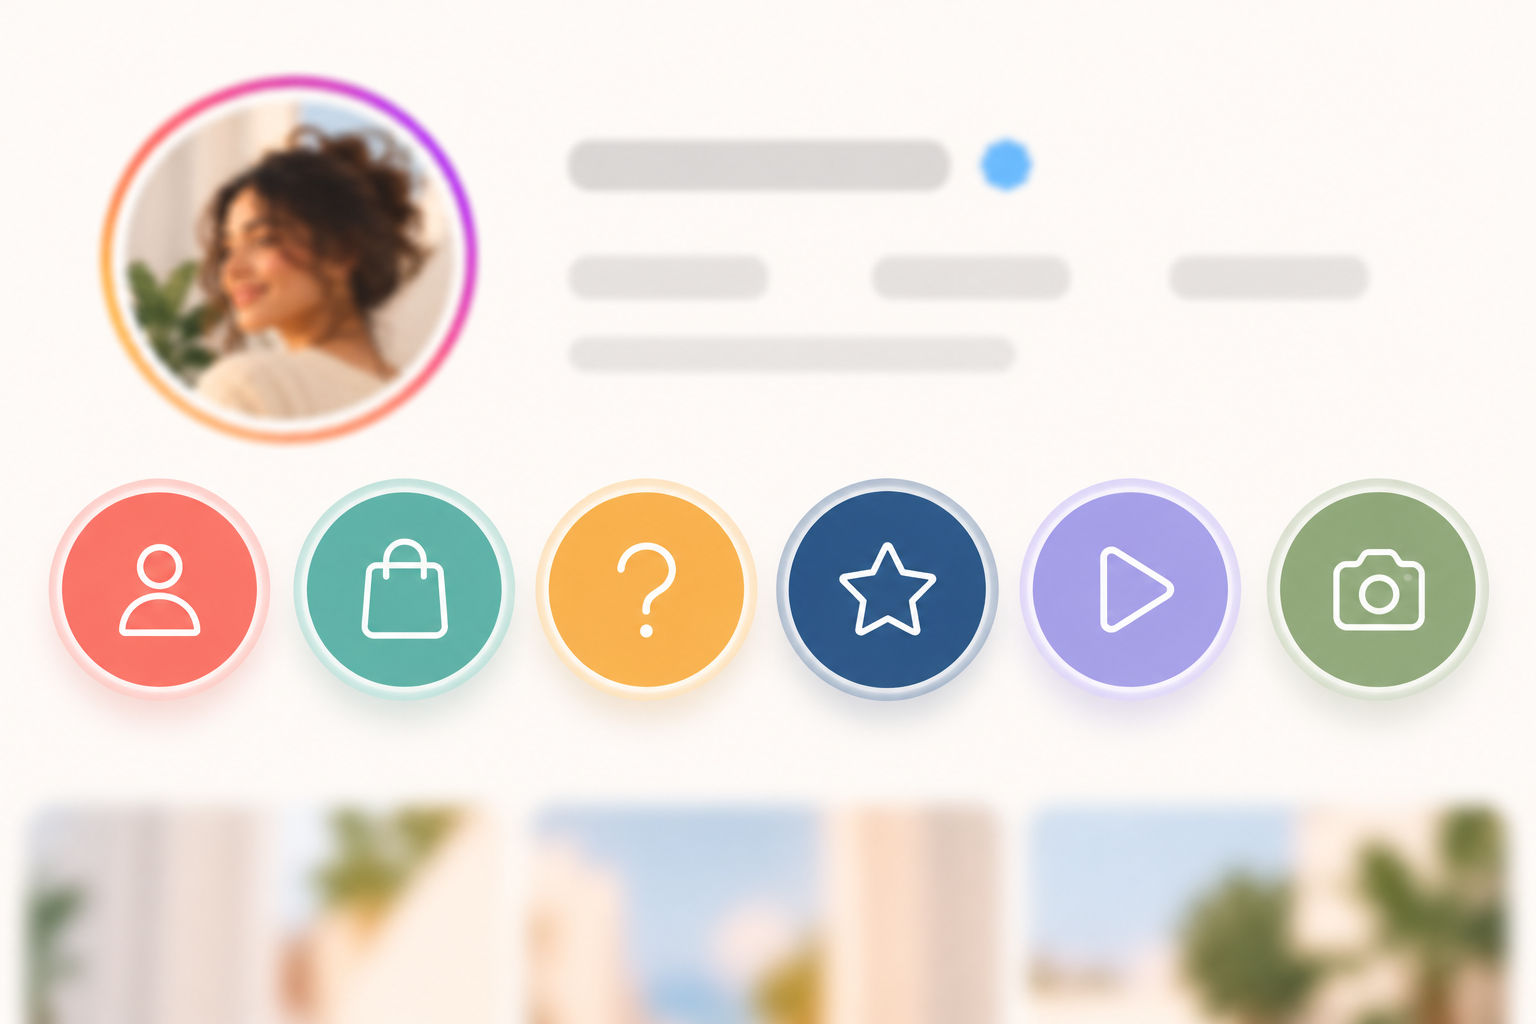
    What are Instagram Highlights? Highlights are collections of Stories that you pin permanently to your profile, displayed as circles under your bio. They don’t expire, so they act like a mini website: a place where new visitors learn who you are, what you offer, and why they should trust you. Highlights tie the whole Instagram Reels vs Posts vs Stories mix together.

    What Should You Put in Highlights?

    • About or Brand Story: Who you are and why you do this.
    • Products or Services: What you offer, with quick demos.
    • FAQs: Answers to questions you get every week.
    • Reviews and Testimonials: Proof that people love your work.
    • How It Works: Tutorials and step-by-step guides.
    • Offers and Launches: Current deals or past campaigns.
    • Behind the Scenes: Your team, events, or travel moments.

    How to Create a Highlight

    1. Go to your profile and tap the plus (+) icon next to your Highlights, or tap New.
    2. Select the Stories you want from your Archive (or, while viewing one of your live Stories, tap Highlight).
    3. Tap Next, choose a cover from a Story frame or upload a custom image, and give the Highlight a short name.
    4. Tap Add. To make changes later, press and hold the Highlight and choose Edit Highlight.

    Best Practices for Instagram Highlights

    • Keep names short. Around 15 characters or fewer so they don’t get cut off under the circle.
    • Design matching covers. Simple icons and your brand colors make your profile look polished.
    • Lead with what new visitors need. Put your About and Offers Highlights where people see them first.
    • Keep each Highlight focused. One topic per Highlight, roughly five to ten Stories.
    • Add text to every frame. Visitors often browse with the sound off.
    • Refresh regularly. Remove outdated prices, expired offers, and old announcements.

    Challenges With Instagram Highlights (and How to Fix Them)

    • Outdated content: Old offers hurt trust. Fix it with a quarterly audit.
    • Messy covers: Mismatched icons look unprofessional. Fix it with one reusable template.
    • Too many circles: Twenty Highlights overwhelm visitors. Fix it by keeping four to six.
    • Weak source Stories: A Highlight is only as good as the Stories inside it. Fix it by recording Stories with Highlights in mind, such as a dedicated FAQ series.
    • Cropped covers: Icons can get cut off in the circle. Fix it by centering your design with plenty of padding.
    Instagram Highlights

    Instagram Reels vs Posts vs Stories vs Highlights: Key Differences Explained

    Reach and Discovery

    Which format reaches the most new people? Reels usually lead, because Instagram recommends them to non-followers. Posts, especially carousels, can also show up on Explore and in search. Stories mostly reach your existing followers, and Highlights mostly reach people who already visit your profile.

    Lifespan and Longevity

    Which format lasts the longest? Posts, Reels, and Highlights stay on your profile until you remove them, while Stories vanish after 24 hours unless you save them. That affects strategy: evergreen ideas belong in Posts and Highlights, and timely updates belong in Stories.

    Production Effort

    Which is the easiest to make? Stories, by a mile. Posts take moderate design time. Reels demand the most planning, filming, and editing. Highlights are quick, as long as you already have strong Stories to save.

    Type of Engagement

    How do people interact with each format? Posts collect saves, shares, and comments. Reels collect views, shares, and follows. Stories collect replies, poll votes, and link taps. Highlights collect profile visits and taps through your key information.

    Where Each Format Fits in the Customer Journey

    • Awareness (strangers): Reels and carousel Posts introduce you to new people.
    • Consideration (profile visitors): Posts and Highlights prove you’re worth following.
    • Loyalty and conversion (followers): Stories and Highlights nurture trust and drive action.

    Which Instagram Format Should You Use? A Goal-Based Guide

    Still unsure how to decide between Instagram Reels vs Posts vs Stories? Match the format to your goal.

    • Want more followers? Start with Reels, then support them with carousel Posts.
    • Want to educate your audience? Use carousels and tutorial Reels, and save the answers you repeat to Highlights.
    • Want to sell? Use Stories with link stickers, product Posts, and Highlights for offers and reviews.
    • Want to build a community? Use Stories with polls, questions, and replies.
    • Want credibility? Use Posts and Highlights filled with testimonials, case studies, and results.
    • Have a time-sensitive announcement? Share it in Stories first, then follow up with a Post.

    How the Four Instagram Formats Work Together: A Sample Weekly Plan

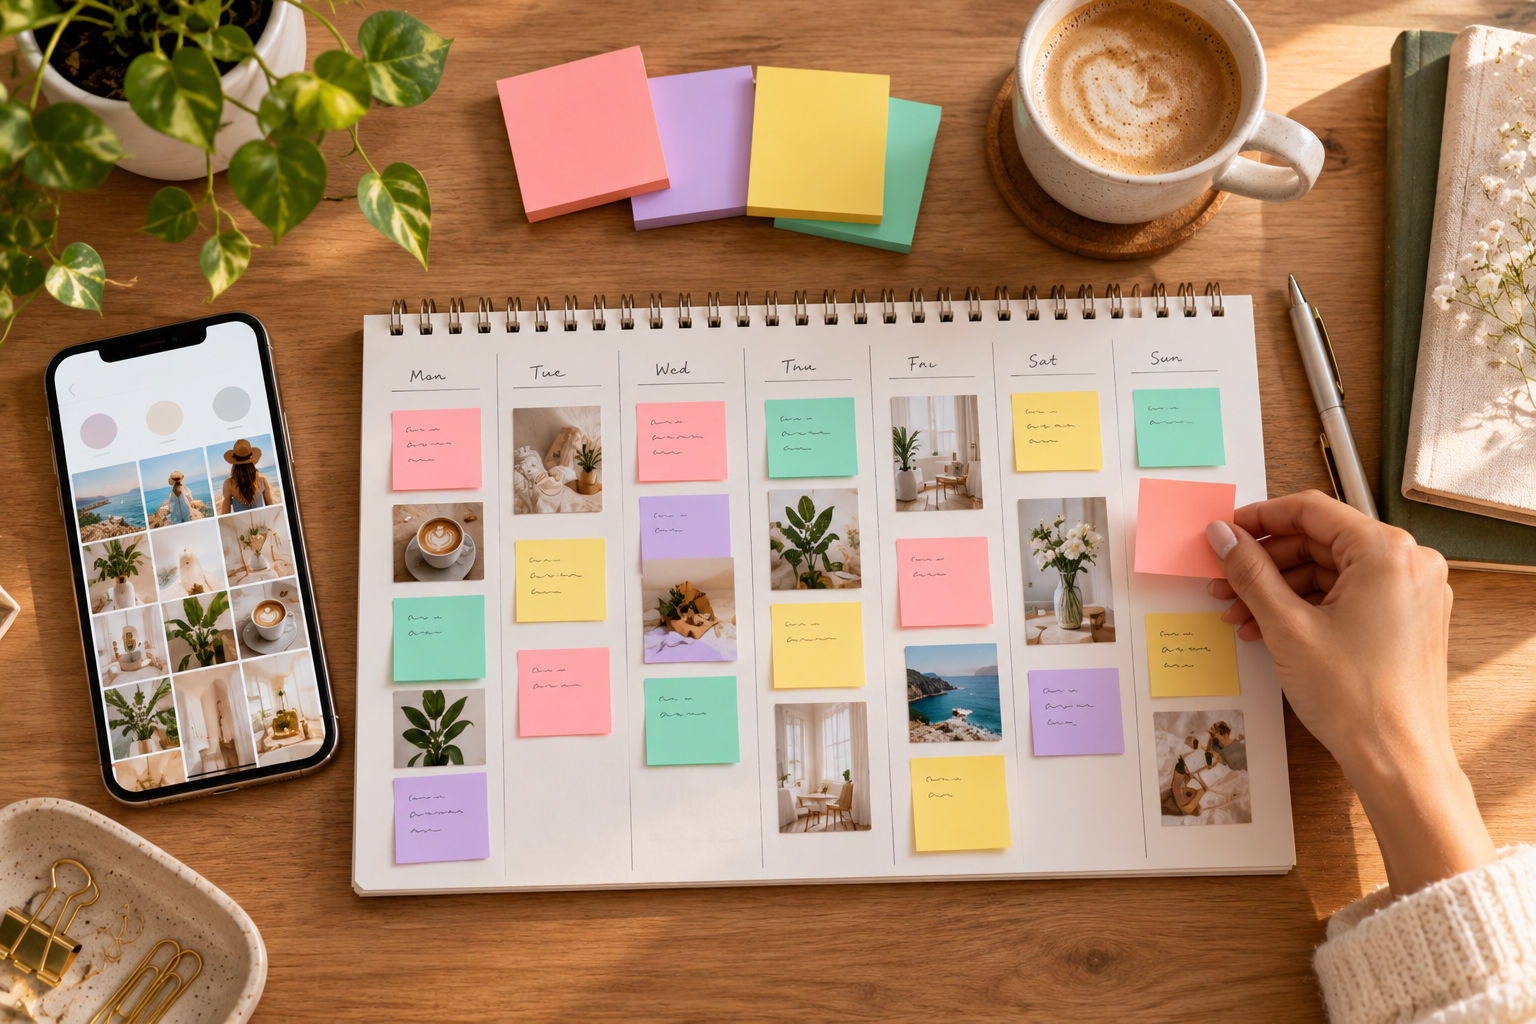
    Here’s the good news: you don’t have to choose. The smartest answer to Instagram Reels vs Posts vs Stories is to use all four formats in a loop. A Reel brings a stranger in. Your Posts and Highlights convince them to follow. Your Stories turn them into fans. Then the cycle repeats. Here’s a simple weekly rhythm you can adapt.

    DayFormatIdea
    MondayReelA quick tip that solves one specific problem
    TuesdayStoryA poll or question about Monday’s tip
    WednesdayCarousel PostA deeper step-by-step guide on the same topic
    ThursdayStoryBehind-the-scenes of how you work
    FridayReelA myth-busting or trend-based video
    SaturdayStoryA Q&A session using the question sticker
    SundayHighlightSave the week’s best Stories to the right Highlight
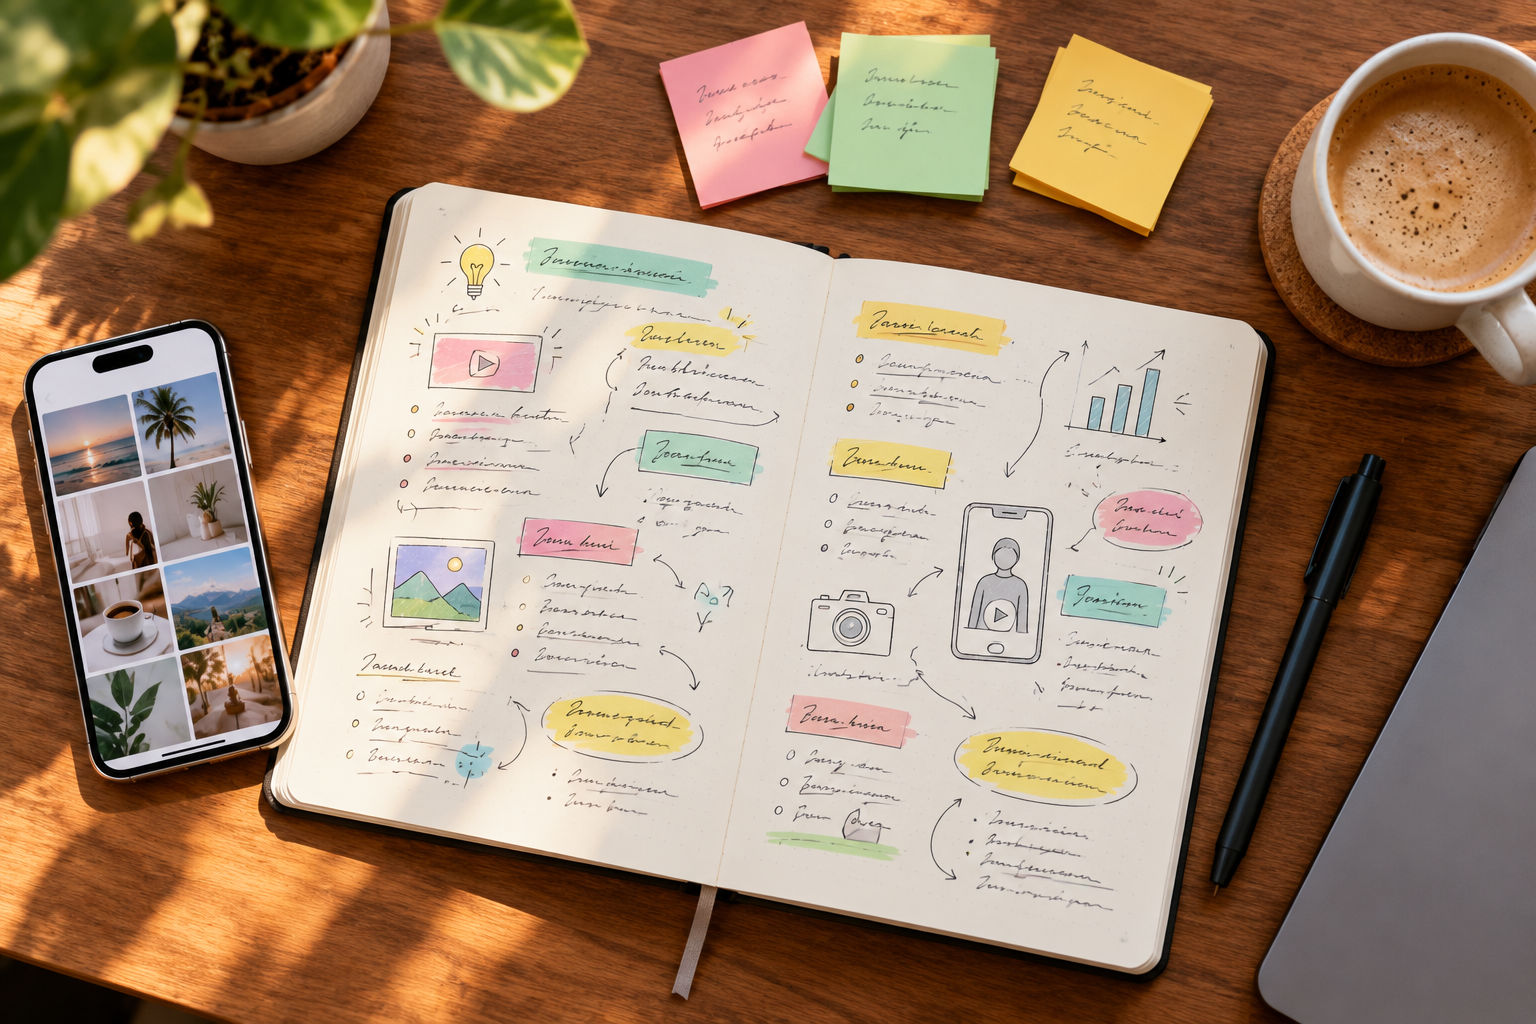
    Instagram Weekly Planner

    Best Practices That Apply to Every Instagram Format

    These habits work no matter which side of Instagram Reels vs Posts vs Stories you spend the most time on.

    • Know the goal of each piece. Reach, trust, or sales. Decide before you create.
    • Keep a consistent look and voice. Colors, fonts, and tone make you recognizable.
    • Optimize your profile. Your name, bio, and link are the landing page for every format.
    • Add captions and alt text. It makes your content accessible and easier to follow.
    • Reply to comments and messages. Engagement is a two-way street.
    • Check Insights weekly. Track reach, watch time, saves, shares, and replies.
    • Repurpose smartly. Turn one idea into a Reel, a carousel, and a Story sequence, but adapt each version instead of copying and pasting.
    • Test one thing at a time. Change the hook, the cover, or the posting time, not everything at once.
    • Avoid engagement bait. Ask real questions instead of begging for likes.

    Common Challenges Across Instagram Content (and How to Solve Them)

    Almost everyone runs into the same hurdles when balancing Instagram Reels vs Posts vs Stories. Here are the big ones, with fixes.

    • Inconsistent posting: Build a simple content calendar and batch-create on one day a week.
    • Algorithm changes: Focus on fundamentals that stay stable: watch time, shares, saves, and useful content.
    • Low engagement: Ask better questions, reply faster, and collaborate with creators in your niche.
    • Creative burnout: Define three to four content pillars and rotate them so you’re never starting from a blank page.
    • Measuring success: Pick one or two key metrics per format instead of tracking everything.
    • Doing too much at once: Start with two formats you can keep up, then add the rest.

    Frequently Asked Questions About Instagram Reels vs Posts vs Stories vs Highlights

    Which is better: Reels or Posts?

    Neither is better, because they do different jobs. Reels are stronger for reaching new people, while Posts (especially carousels) are stronger for teaching and getting saves.

    Do Instagram Stories still matter?

    Yes. Stories keep you visible to existing followers and turn casual fans into customers through replies, polls, and link stickers.

    Can I turn a Story into a Highlight?

    Yes. Open the Story (live or from your Archive), tap Highlight, choose or create a Highlight, and it stays on your profile until you remove it.

    How long do Instagram Stories last?

    Stories disappear from public view after 24 hours. You can keep them privately in your Archive or save them to a Highlight.

    Can I share a Reel to my Story?

    Yes. Tap the paper-plane share icon on the Reel and choose to add it to your Story.

    How many Highlights should I have?

    Four to six focused Highlights are plenty for most accounts. Too many can overwhelm new visitors.

    Should I post the same content in every format?

    No. Adapt the idea to the purpose of each format instead of copying and pasting the same file everywhere.

    How often should I post each format?

    A realistic starting point is two to three Reels a week, one to three feed Posts, Stories on most days, and a Highlights refresh once a month.

    Final Thoughts: Choose the Right Instagram Format for the Right Job

    So, Instagram Reels vs Posts vs Stories vs Highlights: which one wins? All of them, when they work together. Reels bring people in, Posts show your expertise, Stories build relationships, and Highlights turn curious visitors into followers. Start with two formats you can realistically keep up, get comfortable, and then add the rest. Pick one idea today and turn it into a Reel, a carousel, and three Stories. Then check your Insights next week and see what happened.

  • How to Use Instagram in 2026: A Beginner’s Step-by-Step Guide

    How to Use Instagram in 2026: A Beginner’s Step-by-Step Guide

    How to use Instagram is one of the most searched questions for new social media users, and the short answer is simple: download the app, create an account, set up a clear profile, and start sharing photos, Stories, and Reels that people actually want to see. Instagram is a free photo and video sharing app owned by Meta, used to follow friends, discover creators, and build a brand.

    That sounds easy. And honestly, the basics are. But here’s the thing: most beginners open the app, poke around for five minutes, post one blurry photo, and quit. This guide is here to stop that. By the end, you’ll know how to use Instagram from your first tap to your first hundred followers, without any jargon or guesswork.

    Ready? Let’s dive into how to use Instagram, step by step.

    How to Use Instagram: Setting Up Your Account

    What do you need to learn how to use Instagram? You need a smartphone (or a browser), an email address or phone number, and about ten minutes. That’s it.

    Step 1: Download the App and Sign Up

    Open the App Store or Google Play, search for Instagram, and install it. Tap Create new account, enter your email or phone number, choose a password, add your birthday, and confirm the code Instagram sends you. Instagram requires users to be at least 13 years old, so keep that in mind if you’re setting up an account for a family member.

    Step 2: Choose a Username People Can Remember

    What is an Instagram username? It’s the unique @handle that appears in your profile link and every time someone tags you. You can use letters, numbers, periods, and underscores, but no spaces. Keep it short, easy to spell, and close to your name or brand. If your first choice is taken, add a word that describes what you do instead of stacking random numbers.

    Step 3: Build a Profile That Makes People Tap Follow

    Your profile is your storefront. Visitors decide in a few seconds whether you’re worth following, so make those seconds count.

    • Profile photo: Use a clear, well-lit image. A face works best for personal accounts, and a logo works best for brands.
    • Name field: Add a keyword people might search for, like “Priya | Travel Photographer.”
    • Bio: Say who you help and what you post in one or two lines, then add a call to action such as “New tips every Tuesday.”
    • Link: Point to your website, blog, or a single link page.

    Personal, Creator, or Business Account?

    Which Instagram account type should you choose? Choose Personal if you just want to browse and share with friends. Pick Creator if you’re building an audience as an individual, and Business if you sell products or services. Both Creator and Business accounts unlock Insights, which show who’s watching and what’s working. You can switch anytime from Settings and activity. If you’re serious about learning how to use Instagram for growth, go professional from day one.

    How to Use Instagram Feed Posts

    What is a feed post? It’s a photo, video, or carousel that lives on your profile grid and shows up in your followers’ feeds. Feed posts are your long-term content library, so treat them like a portfolio.

    How to Use Instagram to Post Your First Photo or Video

    1. Tap the plus (+) icon at the bottom center or top right of the app.
    2. Select Post and choose one or more photos or videos from your gallery.
    3. Crop, apply a filter, or adjust brightness. Less is more here.
    4. Write a caption that opens with a hook, then adds value.
    5. Tag people or add a location if it fits, then tap Share.

    How to Use Instagram Carousels (and Why They Work)

    What is a carousel post? It’s a single post with multiple slides that people swipe through, and Instagram lets you add up to 20 photos and videos in one. Carousels work brilliantly for tutorials, checklists, and before-and-after stories, because every swipe counts as engagement. If you want a beginner-friendly format, this is it.

    How to Use Instagram Captions and Hashtags

    Here’s what most beginners miss: the first line of your caption is your headline. Make it specific and a little curious. After that, tell a short story, share a tip, or ask a question. Then close with a clear next step, like “Save this for later” or “Tell me your favorite in the comments.” As for hashtags, use a handful of relevant ones instead of a giant block. Quality beats quantity every time.

    How to Use Instagram Stories

    What are Instagram Stories? Stories are photos and short videos that disappear after 24 hours, and they appear in a row of circles at the top of your feed. They’re casual, quick, and perfect for behind-the-scenes moments.

    How to Use Instagram Stories: Posting Your First One

    Swipe right from your feed, or tap the plus icon and choose Story. Snap a photo, record a video, or upload something from your camera roll. Then add text, music, stickers, or a location before tapping Your story. Each video clip runs about 15 seconds, and longer recordings are split into multiple clips automatically.

    How to Use Instagram Stickers to Get People Interacting

    • Polls and quizzes: Quick taps that boost participation.
    • Questions: Invite followers to ask you anything.
    • Links: Send viewers to your blog, shop, or a post.
    • Highlights: Save your best Stories to your profile so they stay visible after 24 hours.

    Now here’s a pro tip: post Stories most days, even if it’s just one frame. Consistency keeps you visible without needing perfect production, and it’s the easiest way to keep using Instagram without burning out.

    How to Use Instagram Reels

    What are Instagram Reels? Reels are short vertical videos, up to three minutes long, that Instagram can recommend to people who don’t follow you yet. That makes them your best tool for reaching a new audience.

    How to Use Instagram Reels Step by Step

    1. Tap the plus icon and choose Reel.
    2. Record clips one at a time, or upload existing videos.
    3. Add audio from Instagram’s music library, or use your own voice.
    4. Trim your clips, add captions, and pick a cover image.
    5. Write a caption, then tap Share.

    What Makes a Reel Perform Well?

    When you’re learning how to use Instagram Reels, what actually helps a video get watched? Three things: a strong hook in the first two seconds, a clear payoff, and on-screen text so viewers can follow along with the sound off. Instagram pays close attention to watch time, shares, and saves. Keep videos tight, cut dead air, and end with something worth sharing. And don’t chase every trend. Pick the ones that fit your niche.

    How to Use Instagram to Connect With Your Audience

    Why does engagement matter when you’re figuring out how to use Instagram? Because the app is a social network first and a publishing tool second. Accounts that reply, comment, and message tend to build loyal communities faster than accounts that only broadcast.

    • Reply to comments in the first hour after you post.
    • Answer Story replies and direct messages personally.
    • Comment thoughtfully on posts from accounts in your niche, not just “nice pic.”
    • Use Collabs to co-author posts and reach a partner’s audience.

    But wait, what about the Explore page? Explore shows content based on what each person likes, so posting on consistent topics helps Instagram understand who should see your work.

    How to Use Instagram to Grow Your Followers

    How do you grow when you’re just learning how to use Instagram? Pick one niche, post consistently, and focus on formats people can share. Growth is rarely overnight, so patience matters.

    A Simple Weekly Plan for How to Use Instagram

    • Two to three Reels to reach new people
    • One or two carousel or photo posts for your core audience
    • Stories on most days for quick updates
    • One 20-minute engagement session each day

    How to Use Instagram Insights to Track What’s Working

    Open Insights from your professional dashboard to see reach, saves, shares, and follower activity. Look for patterns: which topics get saved, which Reels hold attention, and which posting times work best. Then do more of that. It’s simple, but it works.

    Common Mistakes When You Learn How to Use Instagram

    Everyone stumbles while figuring out how to use Instagram. Here are the mistakes worth dodging.

    • Posting randomly: Without a theme, people don’t know why they should follow you.
    • Buying followers: Fake followers don’t watch, comment, or buy, and they can drag your reach down.
    • Ignoring comments: Silence tells both your audience and the algorithm that you’re not interested.
    • Over-editing: Heavy filters make posts look generic.
    • Giving up too soon: Most accounts need weeks of steady posting before results show up.

    Frequently Asked Questions About How to Use Instagram

    Is Instagram free to use?

    Yes. Instagram is free to download and use. You only pay if you choose to run ads or promote posts.

    Can I use Instagram on a computer?

    Yes. You can log in at instagram.com to browse, message, and post from a desktop browser.

    How often should I post on Instagram?

    Aim for three to five feed posts or Reels a week, plus Stories when you can. Consistency matters more than volume.

    How do I get my first 1,000 followers?

    Share useful content in one niche, post Reels regularly, engage with similar accounts, and promote your profile on your other channels. It usually takes months, not days.

    What’s the difference between a Story and a Reel?

    Stories vanish after 24 hours and feel casual, while Reels stay on your profile, are more polished, and reach people who don’t follow you yet.

    Can I make money on Instagram?

    Yes, through brand partnerships, affiliate links, selling products, and Instagram’s own creator tools where available. Earnings depend heavily on your niche and audience.

    Start Using Instagram Today

    So, that’s how to use Instagram in a nutshell. Set up a clear profile, learn the core formats (feed posts, carousels, Stories, and Reels), talk to your audience, and check your Insights every week. You don’t need fancy gear or a big following to start. You just need to post your first one. Open the app, pick a topic you know well, and share something helpful today. Now that you know how to use Instagram, the only step left is to post.

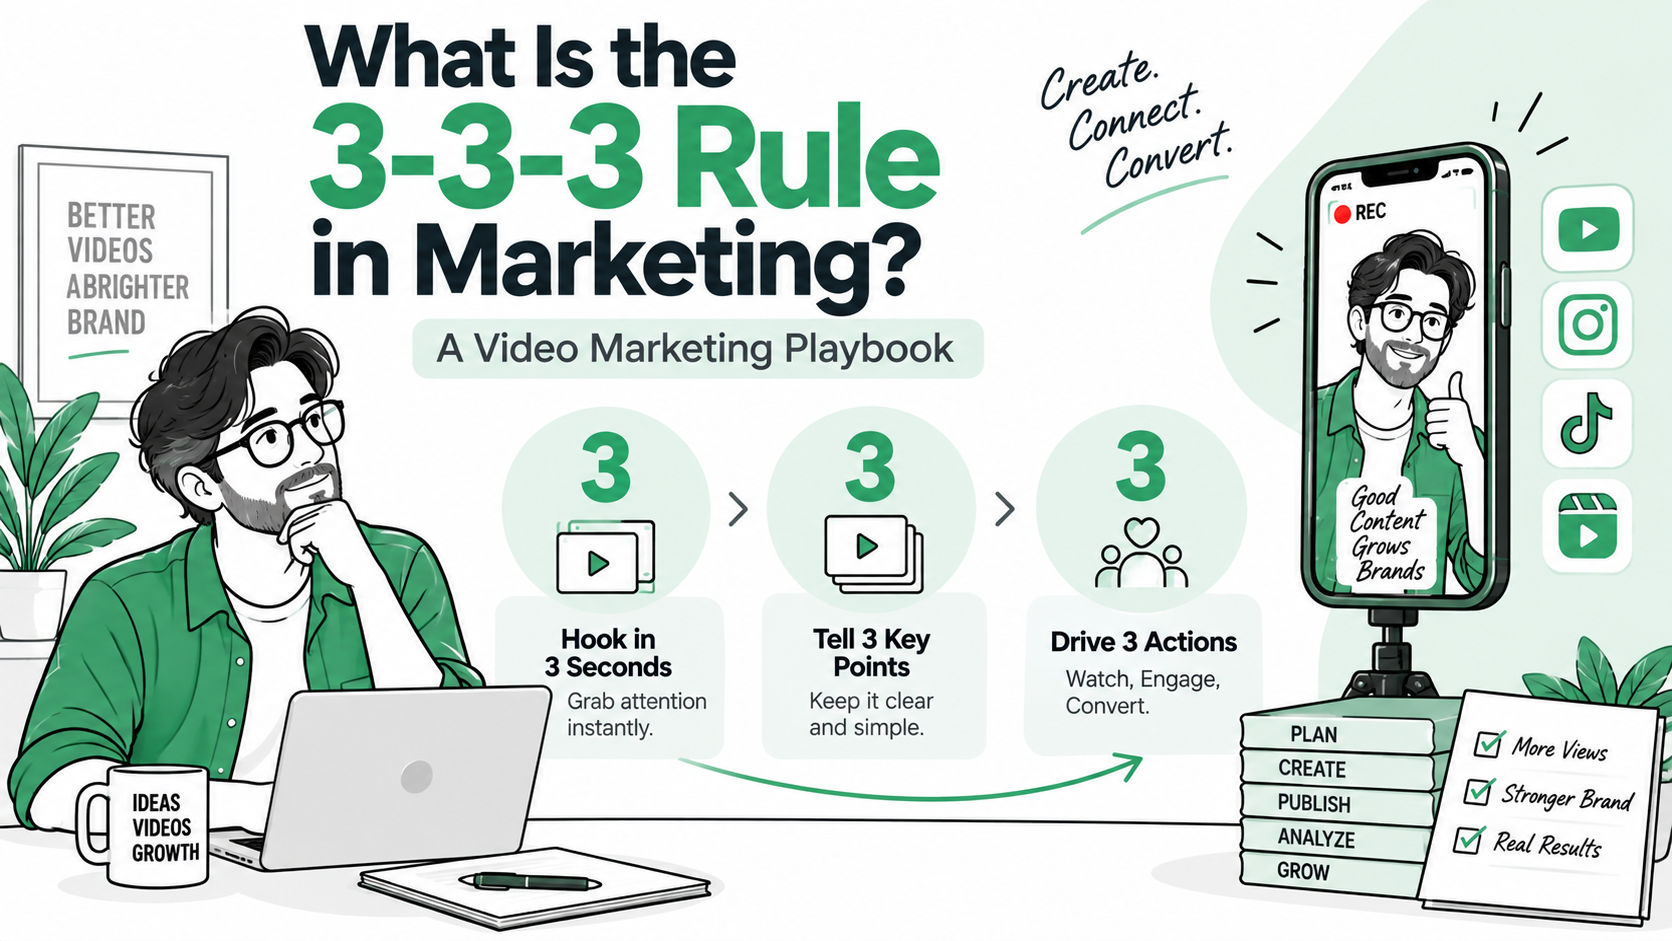
  • What Is the 3-3-3 Rule in Marketing? A Video Marketing Playbook

    What Is the 3-3-3 Rule in Marketing? A Video Marketing Playbook

    Your team is posting every day. You’ve got a content calendar, a Notion board, maybe even a freelancer cutting Reels on the side. And yet, three months in, you still can’t say which video actually moved a customer to buy.

    Sound familiar? You’re not alone. Most brands aren’t struggling to make content — they’re struggling to make the right content, for the right person, at the right moment. That’s a focus problem, not an effort problem.

    Here’s the thing: there’s a simple mental model marketers have been quietly using to fix exactly this, and it’s built on the number three. It’s called the 3-3-3 rule in marketing, and once you see it, you can’t unsee it in every good campaign you scroll past.

    Let’s break it down — what it actually means, where it comes from, and exactly how to apply it if video is your main channel.

    What Is the 3-3-3 Rule in Marketing?

    The 3-3-3 rule in marketing is a simplification framework that forces you to narrow your messaging down to three audience segments, three core benefits (or content types), and three distribution channels — instead of trying to be everything to everyone, everywhere, all at once.

    It’s not a law of physics. It’s not one single, rigid formula either — you’ll find a few different flavors of it depending on who’s teaching it. But every version shares the same DNA: constrain your choices to three, and your marketing gets sharper.

    Why three? Because three is the smallest number that still feels like a real decision. One option isn’t a strategy. Two feels like a coin flip. Three is enough to cover your bases without drowning your team in fifteen half-finished campaigns.

    Why the 3-3-3 Rule Exists (And Why It Actually Works)

    Marketing teams don’t fail because they lack ideas. They fail because they have too many.

    Give a content team an open brief and you’ll get twelve content pillars, five target audiences, and a distribution plan that includes “maybe Pinterest?” Nothing gets the reps it needs to actually perform, because attention is split twelve ways instead of concentrated on three.

    The 3-3-3 rule works because it borrows from a well-documented psychological principle: the rule of three. Humans remember things in threes. Three-act stories. Three-point speeches. “Blood, sweat, and tears.” Our brains are wired to process triads as complete, memorable units — anything more starts to blur.

    So when you force your marketing into a 3-3-3 structure, you’re not being restrictive for the sake of it. You’re designing for how your audience’s brain actually retains information.

    The Three Versions of the 3-3-3 Rule

    Here’s where it gets interesting — and where a lot of the confusion around this term comes from. Depending on the context, “3-3-3” in marketing tends to show up in three distinct ways.

    Version 1: Three Audiences, Three Messages, Three Channels

    This is the strategic-planning version. You pick:

    • Three audience segments — the specific groups you’re actually trying to reach, not “everyone who might buy”
    • Three core messages or benefits — the outcomes you want each segment to associate with your brand
    • Three distribution channels — where you’ll consistently show up (owned, earned, and paid media is a common split)

    The goal is message discipline. If your VP of Marketing can’t repeat your three core benefits from memory, your customers definitely can’t either.

    Version 2: The Creative Structure (3-Second Hook, 3 Proof Points, 3 CTAs)

    This is the version that matters most if you live in ad creative or short-form video. It breaks a single piece of content into three parts:

    • A three-second hook — because on YouTube Shorts, Reels, and TikTok, you’ve got about three seconds before someone’s thumb decides your fate
    • Three proof points — the evidence, stats, or demo moments that back up your claim before the viewer’s attention drifts
    • Three calls-to-action — repeated (not identical) prompts, because most viewers won’t act on the first ask

    This version is essentially a creative brief in miniature. It’s also the one that translates most directly into video marketing, which we’ll get into shortly.

    Version 3: Three Content Types, Three Channels, Three Journey Stages

    The third flavor blends content strategy with the buyer’s journey:

    • Three content types — typically educational, inspirational, and entertaining
    • Three distribution channels — where each type actually gets seen
    • Three buyer journey stages — awareness, consideration, and decision

    You don’t need to pick just one version and marry it forever. Most mature marketing teams end up running a hybrid — Version 1 for quarterly planning, Version 2 for individual video briefs, Version 3 for mapping the content calendar. Here’s the kicker: they all point at the same underlying discipline — stop trying to do ten things badly, and do three things well.

    How to Apply the 3-3-3 Rule to Video Marketing

    Video is where the 3-3-3 rule earns its keep, because video is also where content sprawl gets the most expensive. A bad blog post costs you an afternoon. A bad video costs you a shoot day, an editor’s time, and a media budget behind it that never should have been spent.

    So how do you actually apply the 3-3-3 rule for video content? Walk through it in four steps.

    Step 1: Pick Your Three Audience Segments

    Don’t default to “18-34, interested in fashion.” Get specific. If you’re a D2C skincare brand, your three might be: existing customers due for a repeat purchase, competitor switchers actively comparing products, and first-time researchers who just discovered the category exists. Each of these three needs a different video, not the same ad with a different thumbnail.

    Step 2: Pick Your Three Video Formats

    This is your content marketing rule of three in action. A workable spread for most brands looks like:

    1. Educational — a how-to, a myth-vs-fact breakdown, an explainer
    2. Social proof — a testimonial, a UGC-style unboxing, a before/after
    3. Entertaining/top-of-funnel — a trend-jack, a meme format, a founder-personality clip

    Notice these map neatly onto the buyer journey stages: entertaining for awareness, educational for consideration, social proof for the final push toward acquisition.

    Step 3: Build Every Video Around the 3-Second Hook + 3 Proof Points + 3 CTAs Structure

    Whatever format you’re shooting, apply the creative-structure version underneath it. Open with a hook that states the problem or the surprise in the first three seconds — no logo intro, no slow zoom-in on your product, no “hey guys.” Follow it with three concrete proof points (a stat, a demo, a visual comparison). Close with a CTA, and if the video runs long enough, repeat a variation of it once more before the end card.

    Step 4: Pick Your Three Distribution Touchpoints

    For most brands running a video marketing strategy framework in 2026, this means YouTube (long-form + Shorts), Instagram (Reels + Stories), and one paid retargeting layer sitting behind both. Three is enough to build compounding reach without spreading your editing team across six platforms with six different aspect ratios.

    A Worked Example

    Picture a mid-market D2C nutrition brand. Their old approach: fifteen video ideas a month, posted wherever, tracked nowhere. Engagement was fine. Revenue impact? Nobody could say.

    They ran the 3-3-3 rule instead. Three audiences: loyal repeat buyers, competitor switchers, and category newcomers. Three formats: a founder-led educational series, customer UGC testimonials, and a lighter trend-based Reels series. Three touchpoints: YouTube Shorts, Instagram Reels, and a retargeting layer for anyone who watched 50%+ of a video.

    Within two content cycles, they weren’t making more videos — they were making a third of what they used to. But every video now had a clear job. That’s the actual payoff of the 3-3-3 rule: not volume, focus.

    Common Mistakes When Using the 3-3-3 Rule

    Treating it as a permanent cage. The 3-3-3 rule is a planning tool, not a religion. Revisit your three-three-three every quarter as your audience and channels evolve.

    Picking three channels you can’t actually sustain. Three channels done consistently beats six channels done sporadically. If your team can’t realistically post three times a week per channel, cut the list further before you cut quality.

    Skipping the hook. Teams love debating the CTA and forget the first three seconds are what determine whether anyone sees the CTA at all. Your video hook deserves as much iteration as your headline does.

    Guessing which three are working. This is the one that quietly sinks most 3-3-3 rollouts. You pick three audiences, three formats, and three channels — but six weeks later, nobody’s actually measured which combination is driving comments, watch time, or category share versus competitors. You’re back to guessing, just with fewer variables.

    How the 3-3-3 Rule Compares to Other Marketing Frameworks

    You’ve probably also heard of the marketing rule of seven — the idea that a prospect needs seven touchpoints before they buy. That’s not a competing framework; it’s a companion one. The rule of seven tells you how many times to show up. The 3-3-3 rule tells you what to show up with, and where.

    Same goes for the classic 80/20 rule, where 80% of your results come from 20% of your effort. The 3-3-3 rule is really the operational version of that idea for content teams — it forces you to identify the 20% (your three audiences, three formats, three channels) before you spend a single rupee producing anything.

    None of these frameworks are mutually exclusive. Layer them: use the 3-3-3 rule to choose your focus, and the rule of seven to plan your frequency within each of those three channels.

    Making the 3-3-3 Rule Actually Measurable

    Here’s what nobody tells you about the 3-3-3 rule: picking your three is the easy part. Knowing whether your three are right is the hard part — and that’s a data problem, not a creativity problem.

    This is exactly the gap Lumetrics was built to close. As a Video Intelligence Platform for YouTube and Instagram, Lumetrics runs ten AI modules that show you which of your three audience segments is actually engaging, which of your three formats is winning against your competitors, and — through its YouTube Keyword Rank module, a capability no other platform currently offers — where you actually rank for the searches your audience is typing before they ever hit play.

    In other words, instead of reviewing your 3-3-3 rule once a quarter based on gut feel, you can see it update in real time: which hook is holding attention past three seconds, which proof point is driving saves and shares, and what script to brief next based on what’s already working for your category.

    Lumetrics already powers this kind of decision-making for 48,000+ Chrome extension users, and enterprise teams can see it live against their own brand and three competitors in a 30-minute demo.

    FAQs

    What is the 3-3-3 rule in marketing?
    The 3-3-3 rule in marketing is a framework for simplifying your strategy into three parts — commonly three audience segments, three core messages or content types, and three distribution channels. Some versions apply it to individual pieces of content instead, structuring a video or ad around a three-second hook, three proof points, and three calls-to-action.

    Is the 3-3-3 rule the same for every brand?
    No. The 3-3-3 rule is a flexible mental model, not a fixed formula. Different marketers apply the “three” differently depending on whether they’re planning a quarterly strategy, briefing a single video, or mapping content to the buyer journey. What stays constant is the discipline of narrowing focus to three.

    How do I apply the 3-3-3 rule to video content specifically?
    Pick three audience segments, three video formats (typically educational, social-proof, and entertaining), and three distribution touchpoints such as YouTube, Instagram, and a retargeting layer. Then structure each individual video with a three-second hook, three proof points, and three calls-to-action.

    Why does the 3-3-3 rule work so well for social media video marketing?
    Because attention on platforms like YouTube Shorts and Instagram Reels is scarce and the rule of three matches how the human brain naturally processes and remembers information. Narrowing your video marketing strategy framework to three of everything prevents your message from getting diluted across too many audiences, formats, or channels at once.

    How do I know if my “three” are the right three?
    You need visibility into performance data, not guesswork — watch time, engagement by segment, competitor benchmarking, and keyword rank data are what tell you whether your three audiences, formats, and channels are actually working. A video intelligence platform like Lumetrics is built specifically to surface that.


    Ready to see which three are actually working for your brand? Book a 30-minute live demo — we’ll load your brand and three competitors and show you exactly where you rank.

  • How to Make Instagram Reels With Photos and Music (2026)

    How to Make Instagram Reels With Photos and Music (2026)

    You opened Instagram, scrolled past a dozen Reels that were clearly just photos set to a trending song, and thought: I could do that. Then you opened the Reels camera, saw a video-recording interface staring back at you, and realized you have zero clips to work with — just a camera roll full of photos from last weekend, a product shoot, or a trip you never posted about. The instinct to close the app and give up on Reels entirely is strong. Don’t.

    Here’s the thing: some of the highest-performing Reels on the platform right now aren’t video at all. They’re photo slideshows — five, eight, twelve stills cut to the beat of a trending audio track, timed so each image lands on a drum hit or a lyric change. No filming required, no editing software beyond what’s already sitting inside the Instagram app. This piece walks through exactly how to make Reels on Instagram with photos and music, from picking the right images to nailing the timing to the small settings choices that determine whether your Reel gets pushed to new audiences or quietly buried.

    Why photo Reels work just as well as video ones

    Before the how-to, it’s worth killing a myth: Instagram’s Reels algorithm does not penalize photo-based Reels versus video-based ones. What it actually optimizes for is watch time, completion rate, and engagement signals like shares and saves — and a well-paced photo slideshow set to the right audio can post identical numbers to filmed content, sometimes better, because the visual variety of cut-to-the-beat images creates a rhythm that’s genuinely satisfying to watch. Brand accounts running product launches, before-and-afters, or “get ready with me” content built entirely from stills routinely outperform their own video posts, precisely because a slideshow eliminates shaky footage, bad lighting, and the production overhead that keeps most people from posting consistently in the first place.

    So the real question isn’t whether to create a Reel on Instagram with photos and music — it’s how to do it well enough that it doesn’t read as a lazy shortcut. Here’s the exact process.

    Step 1: Pick your photos with the beat in mind, not the other way around

    The single biggest mistake people make is choosing a song first, then trying to force photos to match its structure. Flip that order. Start by picking 5 to 10 photos that tell a clear, single story — a product from multiple angles, a before-and-after transformation, a day-in-the-life sequence, a countdown of favorites. Visual consistency matters more than any individual photo’s quality: same lighting tone, same aspect ratio if possible, same general color palette. A slideshow that jumps between a bright outdoor shot and a dim indoor one every other frame feels chaotic no matter how good the music is.

    Aim for photos with a natural sense of progression — a story that has a beginning, middle, and payoff — because that structure is what actually holds attention through a 15-to-30-second Reel. If there’s no inherent narrative, create one artificially: order photos from least to most dramatic, or match the visual energy to the song’s build.

    Step 2: Build the slideshow inside the Reels editor

    Here’s how do I reel on Instagram using stills, step by step:

    1. Open Instagram, tap the + icon, and select Reel.
    2. Instead of recording, tap the gallery/upload icon in the bottom-left corner of the camera screen.
    3. Select multiple photos (Instagram lets you multi-select directly from this screen — tap each photo in the order you want them to appear, or drag to reorder afterward).
    4. Instagram will auto-generate a rough timing for each photo, but don’t trust the defaults — you’ll adjust this in the next step.

    If your camera roll doesn’t have enough usable photos, this is also where reels with pictures instead of video pulled from Stories highlights, saved posts, or even screenshots (for topic-driven content like tips or quotes) can fill the gap — the format doesn’t require original photography, just visual consistency.

    Step 3: Add music and sync it to the moment it actually matters

    This is the step most people rush, and it’s the one that decides whether the Reel feels professional or amateur.

    Choosing the track. Tap the music note icon and search Instagram’s audio library. Prioritize trending audio — tracks with the small upward arrow or a visibly high “used in X reels” count — because trending sounds get an extra discovery boost from the algorithm on top of your own follower reach. For best free music for Instagram Reels, Instagram’s built-in library is entirely free to use for personal and most business accounts; you don’t need external royalty-free sites unless you specifically want a track that isn’t in Instagram’s catalog.

    Syncing to the beat. After selecting audio, Instagram shows a waveform. Look for the clearest, most rhythmic section — usually the drop, chorus, or a distinct beat pattern — and trim your selection to start there rather than at the song’s literal beginning. This single choice does more for perceived production quality than almost anything else in the process.

    Timing each photo to the beat. In the editing screen, you’ll see your photos laid out along a timeline beneath the audio waveform. Drag the edge of each photo’s segment so the cut lands exactly on a beat, a lyric, or a musical accent — not just at an even, mechanical interval. This is what separates a slideshow that feels intentional from one that feels like a default PowerPoint transition. Most editors aim for one photo per 1 to 2 seconds for higher-energy tracks, stretching to 2 to 3 seconds for slower, more emotional audio.

    Step 4: Add transitions, text, and a hook — without overdoing it

    A pure photo-to-photo hard cut can work, but a light transition (Instagram’s built-in options include fade, zoom, and slide) smooths the rhythm without adding production time. Pick one transition style and use it consistently across the whole Reel — mixing five different transition types in one slideshow reads as indecisive rather than dynamic.

    If the Reel is instructional or has a specific message, add on-screen text on the first one or two frames — this functions as your hook, and hook strength is what determines whether someone watches past the first second at all. Keep text short: five to eight words, positioned in the upper or middle third of the frame so it’s not obscured by Instagram’s own UI elements at the bottom.

    Step 5: Pick your cover, write your caption, and post at the right cadence

    Your Reel’s cover image is what shows up on your grid and in the Reels tab before someone taps to watch, so choose deliberately rather than accepting the auto-selected first frame — pick whichever photo in your sequence would make a stranger stop scrolling.

    For the caption: lead with a hook in the first line (Instagram truncates captions after roughly 125 characters before the “more” cutoff), and include your primary keyword phrase naturally if the content is search-driven — for example, a caption that says “here’s exactly how I made this slideshow reel with just photos and a trending sound” reinforces both human readability and Instagram’s own content-understanding systems, which increasingly factor caption text into what a Reel is topically about.

    On posting cadence: consistency compounds far more than any single viral attempt. Accounts that post Reels — photo-based or otherwise — on a predictable schedule see steadier reach growth than accounts chasing one big hit and going quiet for weeks afterward.

    One more detail that’s easy to skip: a meaningful share of Reels get watched with the sound off, especially on the initial autoplay scroll before someone decides whether to stop and engage. If your slideshow’s message depends entirely on the audio — a voiceover, lyrics doing narrative work — add on-screen captions or text overlays so the point still lands muted. This is also good practice for accessibility, and Instagram’s own auto-captioning tool can generate a base layer you then adjust for timing against your photo cuts.

    What this looks like for a brand account, not just a personal profile

    If you’re running Reels for a brand rather than a personal account, the calculus shifts slightly: photo slideshows are often the fastest way to turn existing product photography, event coverage, or campaign stills into Reels-native content without commissioning new video. A single product shoot can become five or six separate photo Reels — different angles, different use-case groupings, different trending audio each time — multiplying the content mileage of one photography session.

    This is also where teams managing multiple brand accounts (or watching what competitors are posting) start running into the limits of doing it by feel. Knowing which trending audio is actually driving reach in your specific category, or how your Reels retention compares to a competitor’s, is the kind of thing a video intelligence platform like Lumetrics tracks across Instagram and YouTube — competitor content gaps, format performance, and what to post next, rather than guessing from your own feed alone. For a solo creator making their first slideshow Reel, none of that’s necessary yet — but it’s worth knowing the same underlying question (what’s actually working, and why) is exactly what brand teams optimize against once volume picks up.

    Putting it together

    A photo Reel that performs well isn’t complicated — it’s a handful of visually consistent images, cut on the beat of a trending track, with a strong opening frame and a caption that gives people a reason to stay. None of that requires a camera, a ring light, or editing software beyond what’s already built into Instagram. The gap between a slideshow that feels like a lazy shortcut and one that performs like a filmed Reel comes down entirely to the timing decisions in steps 3 and 4 — get the beat sync and the hook right, and the rest of the format takes care of itself.

    Frequently asked questions

    How do I reel on Instagram using only photos?
    Tap the + icon, select Reel, then use the gallery upload icon to multi-select photos instead of recording video. Instagram lets you arrange, trim, and time multiple stills directly in the Reels editor, the same way you would edit a video clip.

    How do I get to Reels on Instagram?
    Tap the + icon at the top or bottom of the Instagram home screen and select “Reel” from the menu, or tap the Reels icon (the clapperboard-style icon) in the bottom navigation bar to browse and create from there.

    How much money is 1,000 views on Instagram Reels?
    Instagram doesn’t run a universal, fixed per-view payout — earnings depend on eligibility for bonus programs, brand partnerships, or affiliate content, and vary significantly by region and account type. There’s no flat “$X per 1,000 views” rate comparable to a platform-wide ad-share program.

    Can I use any song for an Instagram Reel, or does it need to be free?
    Instagram’s built-in music library is free to use and covers most trending tracks for personal and eligible business accounts. Business accounts in some regions have a more limited licensed catalog, so check the music selection screen for what’s actually available to your account before planning around a specific song.

    How many photos should a Reel slideshow have?
    Most well-paced Reels use 5 to 10 photos for a 15-to-30-second slideshow, timed at roughly 1 to 2 seconds per image for upbeat tracks or 2 to 3 seconds for slower, more emotional ones. Fewer photos held longer tends to feel static, while too many crammed into a short runtime reads as rushed.


    See which trending audio and Reels formats are actually driving reach in your category — live, in 30 minutes. Book a free Lumetrics demo and we’ll plug in your Instagram account alongside three competitors to show exactly what’s working.


  • 5 Best Video Editing Apps for Reels and Shorts (2026 Guide)

    5 Best Video Editing Apps for Reels and Shorts (2026 Guide)

    You’ve got the footage. Maybe even a decent hook idea.

    But then you open your phone’s app store, search “video editor,” and get slammed with forty options, half of them locked behind confusing subscriptions.

    Which one do you actually need?

    Here’s the thing: for Reels and Shorts specifically, you don’t need professional editing software. You need something fast, mobile-first, and built for vertical video — because that’s the format both platforms live on.

    This post ranks the five best video editing apps for Reels and Shorts, specifically by how easy they are to use. Not by feature count. Not by what professional editors prefer. By how fast a beginner can go from raw clips to a published post.

    No paid trials required to follow along. Every app below has a genuinely usable free tier.

    What actually makes an editing app “easy”

    Before the list, let’s define terms.

    “Easy” doesn’t mean fewer features. It means a shorter distance between opening the app and finishing your edit.

    Three things determine that distance:

    • Template availability — can you drop clips into a pre-built structure instead of building from scratch?
    • Auto-captions — does the app generate captions for you, or do you type every word?
    • Export friction — does it export straight to the right aspect ratio and resolution, or do you fight with settings?

    Every app below gets scored against these three. Let’s break it down.

    Quick comparison

    App Price Auto-captions Best for
    CapCut Free Excellent Trend-ready templates, fastest overall
    InShot Free (watermark) / Paid Good Absolute simplest first edit
    VN Video Editor Free, no watermark Good More control without extra complexity
    Canva Free / Paid tiers Fair Teams already using Canva for graphics
    Native editors Free Good (improving) Zero-effort, in-the-moment posts

    1. CapCut — the easiest overall, and it’s free

    CapCut is the single most popular video editing tools for Instagram Reels right now, and for good reason.

    It’s made by the same company behind TikTok, which means it was built specifically for short-form vertical video from day one — not retrofitted from a desktop editor.

    Why it’s easy: CapCut’s template library is enormous. You can literally search “reel transition” or “before and after,” pick a template, drop your clips in the marked slots, and export. No timeline skills required.

    Auto-captions: Excellent. The auto-caption feature is fast, reasonably accurate, and lets you pick from dozens of styled caption templates — bold pop-up text, karaoke-style highlighting, the works.

    Best for: Beginners who want trending, polished-looking Reels and Shorts without learning any actual editing.

    The catch: The sheer number of features can feel overwhelming at first, even though you don’t need most of them. Stick to Templates and Auto Captions for your first few edits before exploring the rest.

    2. InShot — the fastest for a simple cut-and-post workflow

    If CapCut feels like too much, InShot is the stripped-down alternative.

    It’s been around longer, and its interface reflects that: fewer trends, more straightforward tools. Trim, add music, add text, export. That’s most of what you’ll ever touch.

    Why it’s easy: The learning curve is close to zero. Every tool is a labeled icon along the bottom of the screen, and there’s no template rabbit hole to fall into.

    Auto-captions: Decent, though not as polished as CapCut’s. You’ll do a bit more manual timing adjustment.

    Best for: Someone editing their very first Reel or Short who wants a tool that gets out of the way.

    The catch: The free version has a watermark and limited export resolution. You’ll likely want the paid tier once you’re posting regularly.

    3. VN Video Editor — for when you want a bit more control, still without the learning curve

    VN sits in an interesting middle spot.

    It has a real timeline, multiple video and audio tracks, and keyframe animation — features you’d expect from desktop software. But the interface stays clean enough that beginners don’t get lost.

    Why it’s easy: The core cut-trim-add-music workflow is just as fast as InShot’s. The extra power is there when you want it, but it never gets in your way if you don’t.

    Auto-captions: Available, solid accuracy, easy to restyle.

    Best for: Creators who’ve made a handful of Reels or Shorts already and are starting to want more precision — multiple clips synced to specific beats, layered text, that kind of thing.

    The catch: It’s genuinely free with no watermark, which sounds too good to be true. It is true, but expect occasional feature updates to shuffle the interface slightly.

    4. Canva — best if you’re already making other content in it

    If you’re a brand or creator already using Canva for graphics, thumbnails, or carousel posts, its video editor is worth trying before downloading anything new.

    Why it’s easy: Canva’s drag-and-drop logic is identical across every content type it supports. If you already know how to move a text box in a Canva graphic, you already know how to move one in a Canva video.

    Auto-captions: Present, functional, not the strongest of the five.

    Best for: Small teams and solo brand accounts who want one tool for the entire content pipeline — thumbnails, graphics, and video — instead of switching between apps.

    The catch: Canva’s video engine is slower than the mobile-first apps above, especially on longer projects. For a 15-second Reel it’s fine. For anything more ambitious, it can feel sluggish.

    5. Native platform editors (Instagram’s Reels editor and YouTube’s Shorts editor)

    Don’t overlook what’s already built into the apps you’re posting to.

    Why it’s easy: There’s no download, no learning a new interface, and no export step — you record or upload, edit right there, and hit post. It’s the shortest possible distance from idea to published content.

    Instagram’s editor gives you trim, speed controls, text, stickers, and access to the full trending audio library. YouTube’s Shorts editor offers similar basics, plus a green-screen tool and auto-captioning.

    Auto-captions: Both platforms auto-generate captions now, and they’re improving quickly.

    Best for: Quick, low-stakes posts — a reaction, a behind-the-scenes moment, anything that doesn’t need heavy editing.

    The catch: You lose cross-posting flexibility. A Reel edited natively in Instagram doesn’t export cleanly for reuse on YouTube Shorts, so if you’re repurposing one video across platforms, edit it in a third-party app first and upload the finished file to both.

    The one mistake beginners make with vertical video

    Before you pick an app, know this: aspect ratio trips up more first-time editors than anything else on this list.

    Reels and Shorts both want 9:16 vertical video — tall, not wide.

    If your source footage was shot horizontally, or pulled from an old landscape video, every app above will let you drop it into a vertical project. That doesn’t mean it’ll look right.

    You’ll usually get one of two bad outcomes: black bars on the top and bottom, or your footage cropped so tight that faces and text get cut off.

    The fix is simple once you know to look for it. Before you start editing, check your project’s canvas setting and confirm it’s set to 9:16 or “Reels/TikTok” preset — every app on this list has one. Then reframe your clips manually if needed, rather than letting the app auto-crop and hoping for the best.

    This one setting matters more than which app you choose. Get it wrong, and even the best-edited Reel looks amateur the second someone taps in.

    How long should editing actually take?

    If you’re spending more than 15 to 20 minutes on a single Reel or Short, something in your workflow is slowing you down.

    Templates exist precisely to collapse that time. Drop your clips into CapCut’s pre-built structure, swap the placeholder text, add trending audio, and you’re done in under 10 minutes for most formats.

    The apps further down this list — VN, Canva — trade a bit of that speed for more control. That’s a fair trade once you know what you’re doing, but it’s the wrong place to start if you’re still learning.

    So which one should you actually pick?

    Here’s the honest answer: start with CapCut.

    It has the shortest path from zero to a finished, good-looking Reel or Short, and it’s free.

    If CapCut feels like too many buttons, drop down to InShot. Once you outgrow either one — usually after a few dozen posts — VN gives you room to grow without starting over on a new app.

    Think of it as a ladder, not a single choice you’re locked into forever.

    Just testing an idea quickly? Use a native editor. No download, no export step.

    Posting regularly and want it to look polished? CapCut. The templates alone will save you hours over a month of posting.

    Already comfortable with basic editing and want more control? VN. You’ll keep the speed of a mobile app with a real timeline underneath.

    Running a brand account alongside other Canva assets? Canva’s video tool, mainly for the workflow convenience rather than raw editing power.

    Most creators end up using two of these, not just one — a native editor for quick tests and CapCut or VN for anything meant to actually perform.

    Ease of use isn’t the only variable that matters

    Editing is half the equation. The other half is knowing what to make in the first place.

    A perfectly edited Reel built around the wrong topic still underperforms. This is where teams managing brand accounts start layering in a video intelligence platform like Lumetrics — tracking what’s actually resonating across YouTube and Instagram, competitor by competitor, so the editing time goes into content that already has a good shot at working.

    For a solo creator just getting started, that’s a later-stage concern. Right now, the priority is simple: pick an app, start posting, and get the reps in.

    The editing skill compounds fast. Your fifth Reel will take half the time your first one did, regardless of which app you picked.

    Frequently asked questions

    What is the easiest video editing app for beginners?
    CapCut and InShot are both built for near-zero learning curves. CapCut leans toward templates and trend-ready effects; InShot leans toward a simpler, more minimal toolset.

    Is CapCut better than Instagram’s built-in editor?
    CapCut offers far more templates, effects, and caption styling than Instagram’s native editor. For quick, low-effort posts, Instagram’s editor is faster since there’s no separate app or export step involved.

    What’s the best free video editing app for YouTube Shorts?
    CapCut and VN Video Editor are both fully free with no watermark, and both export at resolutions suitable for YouTube Shorts.

    Can I edit a video once and post it to both Reels and Shorts?
    Yes — edit in a third-party app like CapCut, InShot, or VN, export the finished file, then upload that same file to both platforms. Editing natively inside Instagram or YouTube’s own editor doesn’t export cleanly for reuse elsewhere.

    Do I need captions on my Reels and Shorts?
    Not strictly required, but strongly recommended. A large share of viewers watch with sound off, and auto-caption tools in CapCut, InShot, and VN make adding them nearly effortless.


    Want to know which editing style and format is actually driving views in your category — live, in 30 minutes? Book a free Lumetrics demo and we’ll plug in your account alongside three competitors to show exactly what’s working.


  • How to Get 100,000 Views on YouTube the Legal Way (2026)

    How to Get 100,000 Views on YouTube the Legal Way (2026)

    Your video’s stuck at 900 views for the third week straight, your subscriber count is crawling toward four digits at a pace that would embarrass a glacier, and somewhere on Telegram someone is offering you “10,000 real views, ₹499, no password needed.” You know it’s a trap. You’ve heard the stories — channels wiped out overnight, months of work gone, no appeal, no explanation beyond a form email citing “spam, deceptive practices, or scams.” But you’re also staring at the YouTube Partner Program requirements — 1,000 subscribers, 4,000 public watch hours in the last 12 months, or 10 million Shorts views in 90 days — and the honest path looks a lot slower than the shady one.

    Here’s the thing: it isn’t actually slower. It’s just built differently.

    The channels that hit 100,000 views and clear monetization inside a few months aren’t the ones buying traffic. They’re the ones who stopped treating YouTube like a lottery and started treating it like a search engine and a recommendation engine at the same time — because that’s literally what it is. Get both systems working for you, and 100K views on YouTube stops being a milestone you hope for and becomes a number you can more or less schedule. This piece breaks down exactly how, with the specific levers that move watch time, subscriber velocity, and monetization eligibility — the legal way, no bought views, no bot farms, no risk of a permanent strike against your channel.

    Why buying views is the fastest way to lose your channel, not grow it

    Let’s get the risk math out of the way first, because it changes how seriously you’ll take everything after it.

    YouTube’s spam and deceptive practices policy explicitly prohibits using third-party services to inflate view counts, and their detection systems — built specifically to catch bot traffic and click farms — are considerably better than the sellers pitching you the service. When a channel gets flagged, YouTube doesn’t gently trim the fake views. It can strip monetization entirely, terminate the channel, and in cases involving artificial traffic at scale, terminate every other channel linked to that person’s account. Is buying YouTube views against the rules? Unambiguously yes — and the enforcement isn’t theoretical. It happens constantly, and it happens without warning.

    There’s also a subtler cost that never shows up in the terms of service: bought views don’t watch your video. They don’t comment, they don’t subscribe, they don’t come back for your next upload. Every one of them drags your average view duration toward zero, and average view duration is one of the strongest signals YouTube’s algorithm uses to decide whether to show your content to anyone else. You’re not just risking a ban. You’re actively teaching the algorithm that your content isn’t worth recommending.

    So if the illegal path is both dangerous and counterproductive, what’s actually worth doing? Three things, in this order: make the algorithm find you, make the audience stay, and make the platform reward the combination. Let’s break down each one.

    Step 1: Make YouTube’s search and discovery systems find you

    Most creators treat YouTube SEO as an afterthought — something you sprinkle on after the video’s done, in the form of a hashtag dump in the description. That’s backwards. YouTube SEO starts before you press record, because your topic and title decide whether there’s any search demand to capture in the first place.

    Start with what people are actually typing. Use YouTube’s own autosuggest (type your rough topic into the search bar and note what it completes to), check the “People also ask” panel on Google for the same topic, and look at what’s already ranking in the top 10 results for your target phrase. If nothing decent is ranking, that’s not empty opportunity — it’s often a sign there’s no real search volume. Chase topics people are actively searching, not just topics you feel like making.

    Front-load your primary keyword. Your target keyword should appear in your title (ideally in the first half), your video description (in the first two sentences, since that’s what shows before the “show more” cutoff), and at least once, spoken naturally, in the video itself — YouTube’s automatic captioning and content understanding systems read spoken audio as a ranking signal too, not just text metadata.

    Use tags as reinforcement, not decoration. Tags carry less algorithmic weight than they did years ago, but they still help YouTube understand context and category, especially for topics that could be interpreted multiple ways. Five to eight specific tags beat thirty vague ones.

    Is YouTube SEO free? Yes, entirely — there’s no paid tier for ranking better in YouTube search, which is exactly why it’s the highest-leverage lever available to a channel with zero ad budget. The only cost is the research time, and that’s the trade every creator serious about 100,000 views on YouTube ends up making.

    Here’s the thing: none of this matters if people click through and immediately leave. Which brings us to the part that actually compounds.

    Step 2: Engineer retention, because watch time is the real currency

    You might be wondering why two channels can post nearly identical topics and one grows while the other stalls. The answer, almost always, is retention — the percentage of a video people actually watch, and specifically what happens in the first 15 to 30 seconds.

    YouTube has talked publicly about a “hook window” — the opening seconds where a huge share of viewers decide whether to stay or bounce. Some creators call this the 7-second rule on YouTube: if you haven’t given the viewer a reason to keep watching within the first 7 to 15 seconds, a large chunk of your audience is already gone, and YouTube’s algorithm notices that drop-off immediately. What works in that window: opening on the payoff or the most visually interesting moment rather than a slow intro, stating clearly and immediately what the viewer will get from watching, and cutting every second of throat-clearing (no “hey guys, welcome back to my channel” — get straight to it).

    Past the hook, retention is won or lost through pacing. Cut dead air. Cut restated sentences. If you’re teaching something, break it into visibly distinct steps or chapters so the viewer always feels like they’re progressing rather than drifting. Pattern interrupts — a cut to a different angle, an on-screen graphic, a change in energy — every 15 to 20 seconds keep attention from flatlining, especially in longer videos.

    The result? A video with 40% average view duration will consistently outperform a video with double the views but 12% average view duration, because YouTube optimizes recommendations for watch time, not raw view count. This is also the mechanism behind the 4,000 watch-hour requirement for monetization — YouTube isn’t asking “did enough people click,” they’re asking “did enough people actually watch,” which is a fundamentally different bar, and one that retention-focused editing clears far faster than volume alone.

    Step 3: Use Shorts as a legal, high-velocity discovery funnel

    If you’re chasing 100,000 views specifically, Shorts is the single fastest legitimate lever available, and it’s also the newest path YouTube built into the Partner Program requirements — 10 million Shorts views in 90 days now qualifies a channel for monetization on its own, no long-form watch hours required.

    The mechanic that makes this work: Shorts get distributed almost entirely through the Shorts feed’s own recommendation system, which is far more willing to show a new channel’s content to strangers than the long-form home feed is. A Short doesn’t need subscribers or history to reach thousands of people — it needs a strong first-second hook (same 7-second-rule logic, compressed even further, more like 1 to 2 seconds for Shorts), a complete narrative loop within 15 to 60 seconds, and a reason for someone to either rewatch it or click through to your channel.

    The channels that grow fastest treat Shorts and long-form as one funnel rather than two separate strategies: a Short introduces a hook or a fast answer, and the caption or end card points viewers toward the longer video that goes deeper. This is how to gain 1000 subscribers on YouTube without a single dollar spent on promotion — a handful of Shorts hitting the discovery algorithm, funneling a fraction of that reach into long-form subscribers who then contribute to your 4,000-hour watch time total as well.

    Step 4: Build the consistency the algorithm actually rewards

    None of the above compounds without a publishing rhythm YouTube can learn. The platform’s recommendation system builds confidence in a channel over repeated signals — not one viral hit, but a pattern of videos that consistently earn strong retention and click-through. That’s why how to fast grow on YouTube is less about any single video and more about a repeatable production system: a content calendar that doesn’t rely on inspiration striking, a title-and-thumbnail testing habit (even something as simple as drafting three thumbnail options and picking based on which one you’d click if you saw it cold), and a weekly review of your own YouTube Analytics — specifically audience retention graphs and traffic source breakdown — to see exactly where each video is losing people.

    This is also where most solo creators and small brand teams hit a wall: they’re making content but flying blind on what’s actually working, topic by topic, competitor by competitor. Teams running this at scale typically lean on a video intelligence platform — Lumetrics being one built specifically for YouTube and Instagram — to see keyword rank, retention benchmarks, and competitor content gaps in one place rather than piecing it together from YouTube Studio screenshots. That’s less relevant if you’re a solo creator building your first 100K views, but it’s worth knowing the same underlying signals — search demand, retention curves, competitive keyword gaps — are exactly what professional channels are optimizing against once they scale past this stage.

    Putting it together: what the legal path to 100K actually looks like

    Stack these four levers and the picture that emerges is very different from “post and pray.” A video built on real search demand, opened with a hook inside the first 7 seconds, edited for retention rather than runtime, cross-promoted through a Short that funnels into the long-form piece, published on a consistent schedule you can actually sustain — that video is competing on every signal YouTube’s algorithm actually weighs. No bought views required, no risk of a strike, and critically, every view you earn this way is a real person who might subscribe, comment, or come back — which is the only kind of view that has ever counted toward monetization eligibility in the first place.

    The uncomfortable truth is that the “legal way” isn’t the slow way. It’s the only way that survives contact with YouTube’s spam detection, and it’s the only way that builds a channel worth having once you cross the monetization line.

    Frequently asked questions

    Do you need 1,000 subscribers to monetize YouTube?
    For the standard YouTube Partner Program path, yes — you need 1,000 subscribers plus either 4,000 public watch hours in the past 12 months, or 10 million Shorts views in the past 90 days. Meeting either watch-time threshold alongside the subscriber count is what triggers eligibility for review.

    How much per 1,000 views does YouTube pay?
    Earnings vary widely by niche, audience geography, and ad format, typically landing somewhere between $0.25 and $4 per 1,000 monetized views (often summarized as RPM), though this is not a fixed rate and fluctuates with advertiser demand.

    Is YouTube SEO free?
    Yes. Optimizing titles, descriptions, tags, and content for search demand costs nothing beyond your own research time — there’s no paid tier that improves organic YouTube search ranking.

    What is the 7-second rule on YouTube?
    It refers to the idea that a large share of viewers decide whether to keep watching within the first 7 to 15 seconds of a video, based on how strong the opening hook is. Videos that delay their payoff past this window tend to see steep early drop-off.

    How to get 10,000 views on YouTube for free?
    Combine keyword-targeted titles and descriptions with strong retention editing and a Shorts-to-long-form funnel — no paid promotion required. The compounding effect of search visibility plus algorithmic recommendation is what drives free, organic view growth at this scale.


    See how competitor channels are ranking for the keywords you’re chasing — live, in 30 minutes. Book a free Lumetrics demo and we’ll plug in your channel alongside three competitors to show exactly where you stand.


  • Instagram Hashtags Are Dead: What Actually Drives Discovery Now

    Instagram Hashtags Are Dead: What Actually Drives Discovery Now

    You spent twenty minutes picking the “perfect” thirty hashtags. #reels #contentcreator #instagrowth #discoverpage — the whole ritual. You posted at 7 PM because some carousel told you that’s peak time. And the reach came in flat. Again.

    If that sounds familiar, you’re not doing anything wrong — you’re optimizing for a system that stopped existing. The Instagram discovery algorithm in 2026 barely looks at hashtags at all. It looks at what people do with your content in the first ninety seconds, and almost nothing else. That single shift is why so many accounts with technically “correct” hashtag strategy are watching their reach quietly bleed out month over month.

    Here’s the thing. Most creators and brand teams are still fighting the last war. They’re tagging, they’re timing posts, they’re chasing trending audio — all tactics from an algorithm era that’s already over. Meanwhile the accounts actually winning right now aren’t doing any of that harder. They’re doing something different.

    The Real Cost of Chasing a Dead Signal

    Let’s put a number on this. A brand posting five Reels a week, each taking roughly two hours to plan, shoot, and caption — hashtag research included — burns close to 40 hours a month on a discovery lever that Instagram’s own engineering team has all but confirmed barely moves the needle anymore. That’s a full work-week, every month, spent optimizing something that isn’t the thing being optimized for.

    You might be wondering: if hashtags aren’t it, then what actually got your last viral Reel in front of 400,000 people who don’t follow you? It wasn’t the caption. It wasn’t even the audio, really. It was what happened in the first three seconds after someone’s thumb landed on it.

    Comparison graphic showing flat Instagram reach from hashtag stuffing versus rising reach from content-behavior signals

    Preview: The Three Signals That Actually Move the Needle

    Instagram’s discovery surfaces — Reels, Explore, and increasingly the main feed itself — are ranked on a small handful of behavioral signals, not metadata. Three matter more than everything else combined:

    1. Watch time and completion rate — did people watch to the end, and did they watch it again?
    2. Shares and saves — did the content leave the app (sent in a DM, screenshotted, bookmarked) rather than just get liked?
    3. Session continuation — did watching your content make someone stay on Instagram longer, or bounce?

    None of these are things a hashtag can influence. All three are things your content structure can influence — deliberately, measurably, and repeatably. That’s the gap between brands guessing and brands compounding.

    Infographic of the three behavioral signals driving the Instagram discovery algorithm: watch time, shares and saves, session continuation

    How the Explore Page and Reels Ranking Actually Work

    To understand why your Instagram reach has flattened even with a “correct” hashtag strategy, it helps to know what the Explore page and Reels ranking are actually optimizing for. Neither surface works like a search engine indexing keywords. Both work like a matchmaking system: your content gets shown to a small sample of accounts that resemble your existing engaged audience, and the system watches, in real time, what those people do.

    If that sample audience watches to the end, rewatches, shares, or saves, Reels ranking pushes the content to a wider ring of similar accounts. If they scroll past in the first second or two, distribution stops almost immediately — no amount of hashtag metadata reverses that verdict. The Explore page runs on a close variant of the same logic, just with a slightly heavier weighting toward saves and profile visits, since Explore traffic skews toward people actively looking for something to follow, not just something to watch once.

    This is also why account size stops mattering as much as it used to. A 2,000-follower account with a Reel that nails watch time and completion rate can out-reach a 200,000-follower account posting something forgettable, because the Reels ranking system doesn’t care how big your existing audience is — it cares whether the new audience it tests you against keeps watching.

    So What’s Actually Going On Inside Instagram’s Discovery Algorithm?

    Instagram (and Meta more broadly) moved to what’s effectively a recommendation engine closer to TikTok’s than to the old chronological-feed, hashtag-indexed Instagram of 2018. The platform no longer needs hashtags to categorize content for search-like discovery, because it has something far more precise: it can watch what actually happens when a piece of content is shown to a small test audience, and then decide — in real time — whether to keep pushing it to more people.

    This is why two nearly identical Reels, posted the same week, with the same hashtags, can have wildly different outcomes. The algorithm ran a live experiment on both, and only one of them made people stop scrolling.

    But here’s the kicker: this isn’t actually bad news. A hashtag-driven system was, by nature, a black box you could only guess at. A behavior-driven system is one you can reverse-engineer, because the signals it rewards — retention, shares, saves — are the exact same signals that indicate genuinely good content. For the first time, “make things people actually want to watch” and “win the algorithm” are the same instruction.

    The Content Strategy That Actually Drives Discovery Without Hashtags

    If you want to increase Instagram reach without hashtags carrying any of the weight, the strategy has to be rebuilt around the three signals above, not around tagging. In practice, that looks like:

    1. Engineer the first three seconds for a pattern interrupt

    Completion rate is decided before most people consciously register what they’re watching. A visual or verbal hook that breaks the expected pattern — a counter-intuitive claim, an unexpected visual, a direct question aimed at the exact viewer — buys you the next ten seconds. Without that, your watch-time curve is dead on arrival, no matter how good the payoff later in the video is.

    2. Build for the rewatch, not just the watch

    Content that rewards a second viewing (a joke with a setup you only catch on replay, information delivered fast enough that people loop it to absorb it, a visual detail planted early that pays off at the end) inflates completion and replay rate simultaneously — one of the strongest combined signals in the current system.

    3. Design explicitly for the share, not just the like

    A like costs a viewer nothing and signals almost nothing to the algorithm by comparison. A share means someone thought of a specific person and was willing to spend a small amount of social capital sending it to them. Content built around a relatable, specific, “this is so you” moment — rather than generic broad humor — earns dramatically more shares because it gives the sharer a reason to send it.

    4. Make saves worth earning

    Saves spike when content has residual value — a checklist, a framework, a “come back to this later” utility. If your Reel makes a claim, back it with something concrete enough that people bookmark it to reference again, not just to remember they liked it once.

    The Proof: What Happens When Brands Actually Track This

    This isn’t theoretical. Brands running Instagram content strategy through actual video intelligence — rather than gut feel — routinely find that their top-performing Reels by watch time and completion rate correlate almost perfectly with reach, while their hashtag choices show close to zero correlation with performance once you control for content quality. That’s not a hunch; it’s what shows up when you actually run comment sentiment and content-structure analysis across a brand’s own back catalog against its competitors’ — the videos winning distribution are consistently the ones with the strongest first-three-second hooks and the highest share-to-view ratios, regardless of which hashtags were bolted onto the caption.

    This is exactly the kind of pattern Lumetrics’ Video Intelligence Platform is built to surface — pulling YouTube and Instagram performance data side by side so a brand can see, with actual numbers, which structural choices in a competitor’s Reels are driving discovery, and which of their own posts are quietly underperforming for reasons that have nothing to do with hashtags. Instead of guessing at a content brief, a team can walk in already knowing what the hook, pacing, and payoff need to look like.

    Lumetrics video intelligence dashboard comparing Instagram Reels watch time and share rate across competitor brands

    A Quick Before-and-After

    Picture two skincare brands posting near-identical product Reels in the same week. Brand A spends 45 minutes on hashtag research and posts at the “optimal” time. Brand B spends that same 45 minutes rewriting the first three seconds and adding a specific, save-worthy tip in the caption. Brand A’s Reel gets 1,200 views, almost all from existing followers. Brand B’s Reel gets 38,000 views, with the majority coming from non-followers via the Explore page and Reels ranking pushing it out after a strong early completion rate. Same product, same week, same effort — the only variable that moved was which signal they optimized for. That gap is the entire argument for rebuilding your Instagram content strategy around behavior instead of metadata.

    What To Actually Do About It This Week

    You don’t need to overhaul your entire content calendar overnight. Start smaller:

    • Pull your last 10 Reels and rank them by watch-time percentage, not likes. The gap between your best and worst performer is your real content-quality signal.
    • For your next three posts, write the first three seconds before you write anything else. If the hook doesn’t survive on its own, the rest of the video won’t get watched anyway.
    • Stop spending research time on hashtag sets. Redirect that time into scripting a stronger open and a payoff worth sharing.

    None of this requires a bigger budget or a bigger team. It requires a different meeting. Instead of opening the weekly content review by asking “what hashtags did we use,” open it by asking “where did people drop off, and why.” That single change in what gets discussed in the room tends to matter more than any tool, any posting schedule, or any trending-audio chase. Teams that make this switch usually see the shift show up within two to three posting cycles — not because the algorithm got kinder to them, but because they finally started making decisions based on what it actually rewards.

    The accounts pulling ahead right now aren’t the ones with better hashtag research. They’re the ones who noticed the game changed and rebuilt their content strategy around the behaviors that genuinely drive distribution — while everyone else keeps polishing a lever that stopped being connected to anything.

    Bar chart showing 38,000 views versus 1,200 views for two identical Instagram Reels, illustrating the impact of optimizing for discovery signals over hashtags

    Frequently Asked Questions

    Do hashtags on Instagram still matter at all in 2026? Hashtags still have a small residual function — mainly for niche or local search-style discovery and for signaling topic to the algorithm on brand-new accounts with no engagement history yet. But for established accounts, hashtags contribute negligibly compared to watch time, shares, and saves, which is why Instagram hashtags don’t work the way they used to as a primary reach lever.

    How do I increase Instagram reach without hashtags? Focus on the first three seconds of every Reel to protect completion rate, build in a reason for viewers to share the content with a specific person, and give people something worth saving for later. These three behavioral signals currently outweigh every metadata-based tactic, including hashtags, posting time, and caption keywords.

    What is the single biggest ranking signal in the Instagram discovery algorithm right now? Watch time and completion rate consistently show the strongest correlation with reach, because Instagram’s recommendation system tests content on small audiences first and expands distribution only when people actually watch it through.

    Should brands stop using hashtags entirely? Not entirely — a small set of relevant hashtags costs little and can still help brand-new content get an initial nudge. The mistake is treating hashtag research as a meaningful use of strategic time when the real return is in content structure and Instagram content strategy built around discovery behavior.

    How can a brand actually measure which content signals are working? By tracking watch-time percentage, share rate, and save rate per post over time, and comparing structural elements (hook type, pacing, payoff) across the best and worst performers — ideally benchmarked against competitors’ content too, which is where a video intelligence platform does the heavy lifting instead of manual spreadsheet tracking.

  • Why Your Video Loses Viewers in the First 30 Seconds (And the 7-Step Fix Top Brands Use)

    Why Your Video Loses Viewers in the First 30 Seconds (And the 7-Step Fix Top Brands Use)

    What makes viewers drop off in the first 30 seconds of a video? Usually, it’s not the production quality — it’s the opening. Most videos open with context or explanation, and viewers have already left before the “why” ever arrives.

    If you’ve ever pulled up an analytics dashboard and watched your retention graph fall off a cliff right after the intro, you already know this feeling. You spent hours on the script, the shoot, the edit — and the graph doesn’t care. It just drops.

    Here’s the good news: this isn’t a talent problem, and it isn’t a budget problem. It’s a structure problem. And structure can be copied, tested, and fixed.

    In this piece, we’re going to break down the exact 7-step opening framework that consistently outperforms “intro-first” videos across YouTube and Instagram — the same pattern showing up again and again in the top-performing content across categories. Then we’ll show you the part most teams skip: how to find out which of these openers is already working for your specific category, before you shoot a single frame.

    Let’s get into it.


    Why the First 30 Seconds Carry the Whole Video

    Here’s the uncomfortable truth: attention on video platforms isn’t earned through better lighting or a sharper thumbnail. It’s earned through tension — an emotional hook that makes someone want to know what happens next.

    Platforms reward this behavior algorithmically. A video that holds viewers through the first 30 seconds tends to get pushed further, because the platform reads that early retention as a signal that the content is worth showing to more people. A video that loses viewers early sends the opposite signal — and it gets buried, no matter how good the rest of the content is.

    So the first 30 seconds aren’t just an intro. They’re the gate. And most videos are opening the wrong door.

    The 7-Step Hook Framework

    This is the structure behind openings that consistently hold attention — broken down step by step, so you can apply it to your next script.

    7-step video hook framework — pain, truth, vision, logic, hook stack, personal moment, payoff preview

    Step 1: Open With the Moment of Pain

    Before you introduce your topic, name the frustration your viewer is already feeling. Not your frustration — theirs. Write down the exact sentence they’d say to a friend when they’re annoyed about this problem, and open with a version of that line, using “you” instead of “I” or “we.”

    When someone feels recognized in the first five seconds, they lean in instead of scrolling past. You’ve earned the right to teach them something — but only after they feel understood.

    Step 2: Land a Relatable Truth Line

    This is the short, punchy line that captures what everyone in your category quietly already believes but rarely says out loud. Something in the spirit of “Let’s be honest…” or “Here’s the truth about…” — under seven words, mirroring the exact frustration you just named.

    It works because it feels less like marketing and more like someone finally saying the thing out loud.

    Step 3: Paint the Vision

    People don’t follow information. They follow transformation. So the next line isn’t a feature — it’s a picture. What does it look like if this actually works? Write that as a single, vivid sentence your viewer can picture immediately.

    This is the emotional hook. The next step is where you back it up with logic.

    Step 4: Build the Logic Bridge

    Now you explain why this is happening — tying the problem to a behavior or a pattern your audience will nod along to. This is the “here’s why this keeps happening” moment. It doesn’t need heavy data; it needs one clear, credible reason that makes the pain make sense.

    Step 5: Stack the Hook

    This is where the first four steps combine into a repeatable three-line formula:

    • Pain — “You ever notice how…?”
    • Truth — “It’s not actually X, it’s Y.”
    • Promise — “By the end of this, you’ll…”

    This three-layer stack is the backbone behind most high-retention openings, regardless of category or platform. It’s simple enough to write in under a minute once you know the shape.

    Step 6: Make It Personal

    Numbers and frameworks build credibility. A brief personal moment builds trust. One line referencing your own version of this struggle, followed by a “but then” pivot, does more for connection than a full paragraph of credentials.

    Step 7: Preview the Payoff Early

    Before diving into the full breakdown, tease the outcome. A quick visual cue, a graph, a before-and-after glance — anything that shows the payoff is real and coming. This single move has an outsized effect on how long people stay watching, because it gives them a concrete reason to keep going instead of a vague promise.

    Here’s Where Most Teams Get Stuck

    Knowing the framework is one thing. Knowing which version of it is already winning in your category is another problem entirely.

    Because here’s the catch: “Moment of Pain” for a BFSI brand looks nothing like “Moment of Pain” for a D2C skincare brand. The hook stack that works for a fintech explainer isn’t the one working for a beauty creator. Copying a generic framework gets you generic results. What actually moves the needle is knowing exactly which pain lines, truth lines, and pacing choices are already outperforming everything else — for your competitors, in your category, this month.

    That’s the part most teams either guess at or skip entirely, because it means manually watching dozens of competitor videos, timestamping their openings, and reverse-engineering what’s working. It’s not a lack of effort — it’s a lack of time.

    This is exactly the gap Lumetrics’ AI Script Generation module was built to close. Instead of guessing at a hook, the module pulls the top-performing videos in your category, breaks them down by Hooks, Tonality, Pacing, and Visual structure, and generates a timestamped script grounded in what’s already proven to work — refined further against your own brand guidelines and audience sentiment. It’s the difference between applying a framework in theory and applying the exact version of it that’s currently winning in your space.

    Lumetrics AI Script Generation module showing timestamped hook breakdown by tonality and pacing

    Putting It Together

    The first 30 seconds of your next video don’t have to be a guess. Run through the seven steps — pain, truth, vision, logic, hook stack, personal moment, payoff preview — and you’ll already be ahead of most of what’s competing for the same attention.

    But if you want to skip the manual research and know precisely what’s working in your category right now, that’s exactly what Lumetrics is built for.

    See your brand’s video performance inside Lumetrics — live, in 30 minutes. We’ll plug in your brand and three competitors so you can see exactly where you rank, how your audience feels, and what to script next.

  • How YouTube Algorithm Changed Over Time: A Complete Evolution

    How YouTube Algorithm Changed Over Time: A Complete Evolution

    Introduction: The Journey of YouTube’s Algorithm

    Remember when YouTube just showed you the most-watched videos? Yeah, those days are long gone. The platform that started as a simple video-sharing site has completely transformed how it decides what you see. Understanding how YouTube algorithm changed over time helps you grasp why certain videos blow up while others disappear into obscurity.

    When YouTube launched in 2005, the algorithm was basically “whatever gets the most clicks wins.” Fast forward to 2026, and we’re talking about sophisticated AI systems that understand context, user behavior, and even emotional engagement. It’s wild how much has shifted.

    Let me walk you through this evolution. You’ll see patterns emerge that explain why YouTube recommendations work the way they do today. This isn’t just tech trivia—it’s practical knowledge that matters if you create videos, consume content, or just want to understand the internet better.

    The Early Days: Views and Watch Time Rule

    What was the original YouTube algorithm based on? Pure engagement metrics, mostly views. In the early years, YouTube kept things simple. More views meant you ranked higher. That’s it. No complexity.

    The View Count Era (2005-2012)

    Back then, if your video got clicked more, YouTube promoted it more. This created a straightforward incentive structure. Want visibility? Get views. Want views? Make clickable content. Creators figured out tricks quickly—sensational thumbnails, misleading titles, controversy. The system rewarded whatever got clicks, regardless of whether people actually enjoyed the content.

    But here’s what happened: users started complaining. They’d click a video expecting something awesome, then feel disappointed. YouTube had a problem on their hands. They’d built a system that optimized for clicks, not satisfaction.

    The Shift to Watch Time (2012-2016)

    Then YouTube made a crucial change. Instead of just counting views, they started measuring how long people actually watched videos. Why? Because watch time tells a better story about whether someone actually liked your content.

    This single shift changed everything. Suddenly, you couldn’t just get people to click and disappear. You had to keep them watching. This pushed creators toward longer, more substantial content. It rewarded storytelling over sensationalism. Videos that kept you glued to the screen—even if they weren’t flashy—started ranking higher.

    The impact was massive. YouTube’s content quality improved noticeably. Clickbait still existed, but it became less effective as a primary strategy.

    The Intelligence Era: Context, Behavior, and AI

    Why did YouTube stop relying on simple metrics? Because the platform grew massive, and simple metrics couldn’t handle the complexity anymore. YouTube needed smarter systems.

    Adding Context and User Behavior (2016-2020)

    During this period, YouTube algorithm changed significantly by incorporating what you, the individual user, actually cared about. The system started tracking:

    What videos you watched completely versus skipped. Which thumbnails made you click. How long you paused between videos. Which creators you subscribed to and how loyal you were. What you searched for. Even videos you watched from external websites.

    This created a deeply personalized experience. Two users could watch the exact same video and get completely different recommendations afterward. The algorithm learned your taste faster than you could articulate it yourself.

    But there’s something important here: YouTube also started deprioritizing certain content. Videos with high click-through rates but low completion rates (classic clickbait) got pushed down. Recommendations that led people to leave YouTube entirely got eliminated. The system optimized for keeping you on the platform, watching more content.

    Machine Learning and Neural Networks (2020-2026)

    What does modern YouTube’s recommendation system actually do? It analyzes thousands of signals simultaneously using deep learning. This isn’t just math anymore—it’s artificial intelligence that’s constantly improving itself.

    By the early 2020s, YouTube had shifted to neural network-based systems. These could recognize patterns humans never would. The system learned that certain music in the background increased watch time. It noticed that videos with specific pacing held attention better. It discovered that people who watched video type A at 2 PM were likely to watch video type B at 6 PM.

    The complexity grew exponentially. YouTube started using something called “collaborative filtering,” which is fancy for “people like you enjoyed this, so you probably will too.” Combined with content analysis, user behavior prediction, and dozens of other factors, the algorithm became incredibly sophisticated.

    Here’s what really changed: YouTube stopped just showing you what’s popular. Instead, it shows you what you’re most likely to engage with. Those aren’t the same thing.

    Modern Challenges: Balancing Growth and Responsibility (2020-2026)

    How has YouTube algorithm changed to handle misinformation and harmful content? Slowly, and often reluctantly. This is where things get complicated.

    The Algorithm vs. Truth Problem

    Around 2017-2018, people realized something troubling: YouTube’s algorithm was great at recommending engaging content, but engagement doesn’t equal truth. Conspiracy theories, misinformation, and extreme content often kept people watching longer than factual material.

    YouTube faced pressure from governments, advertisers, and users to change this. So they added new ranking factors: authoritative sources, fact-check signals, and reduced recommendations for borderline content. It was tricky though. You can’t just ban content—you have to reduce recommendations while staying neutral.

    This period showed something important about algorithmic evolution: it’s not just about technology, it’s about responsibility. YouTube had to balance what makes the platform successful (engagement) with what makes it healthy (accuracy).

    Creator Economy and Algorithmic Literacy (2020-2026)

    As the algorithm became more powerful, creators had to become algorithmic scholars. They studied thumbnail design, title optimization, keyword placement, and retention curves. Some became so good at gaming the system that they could predict viral success.

    But YouTube kept evolving to prevent gaming. The platform added new signals that were harder to manipulate. Sentiment analysis from comments. How many times viewers rewatched sections. Whether people added videos to playlists. Average view duration versus session duration. It became an arms race between creators trying to hack the algorithm and YouTube trying to make it unhackable.

    What emerged by 2026 was interesting: the best creators stopped trying to game the algorithm. Instead, they made content that genuinely served their audience, which happened to perform well algorithmically. The system finally aligned incentives.